Credits pay for new chapters, exports, AI features and storage. This guide shows how to keep an eye on the balance, top it up by hand or automatically, and trace every credit that came in or went out. For what credits are and what uses them, see Credits and plans.
1. Open the Credits window#
Click the credits badge in the top bar. It shows the balance of the workspace you are working in. The Credits window opens.
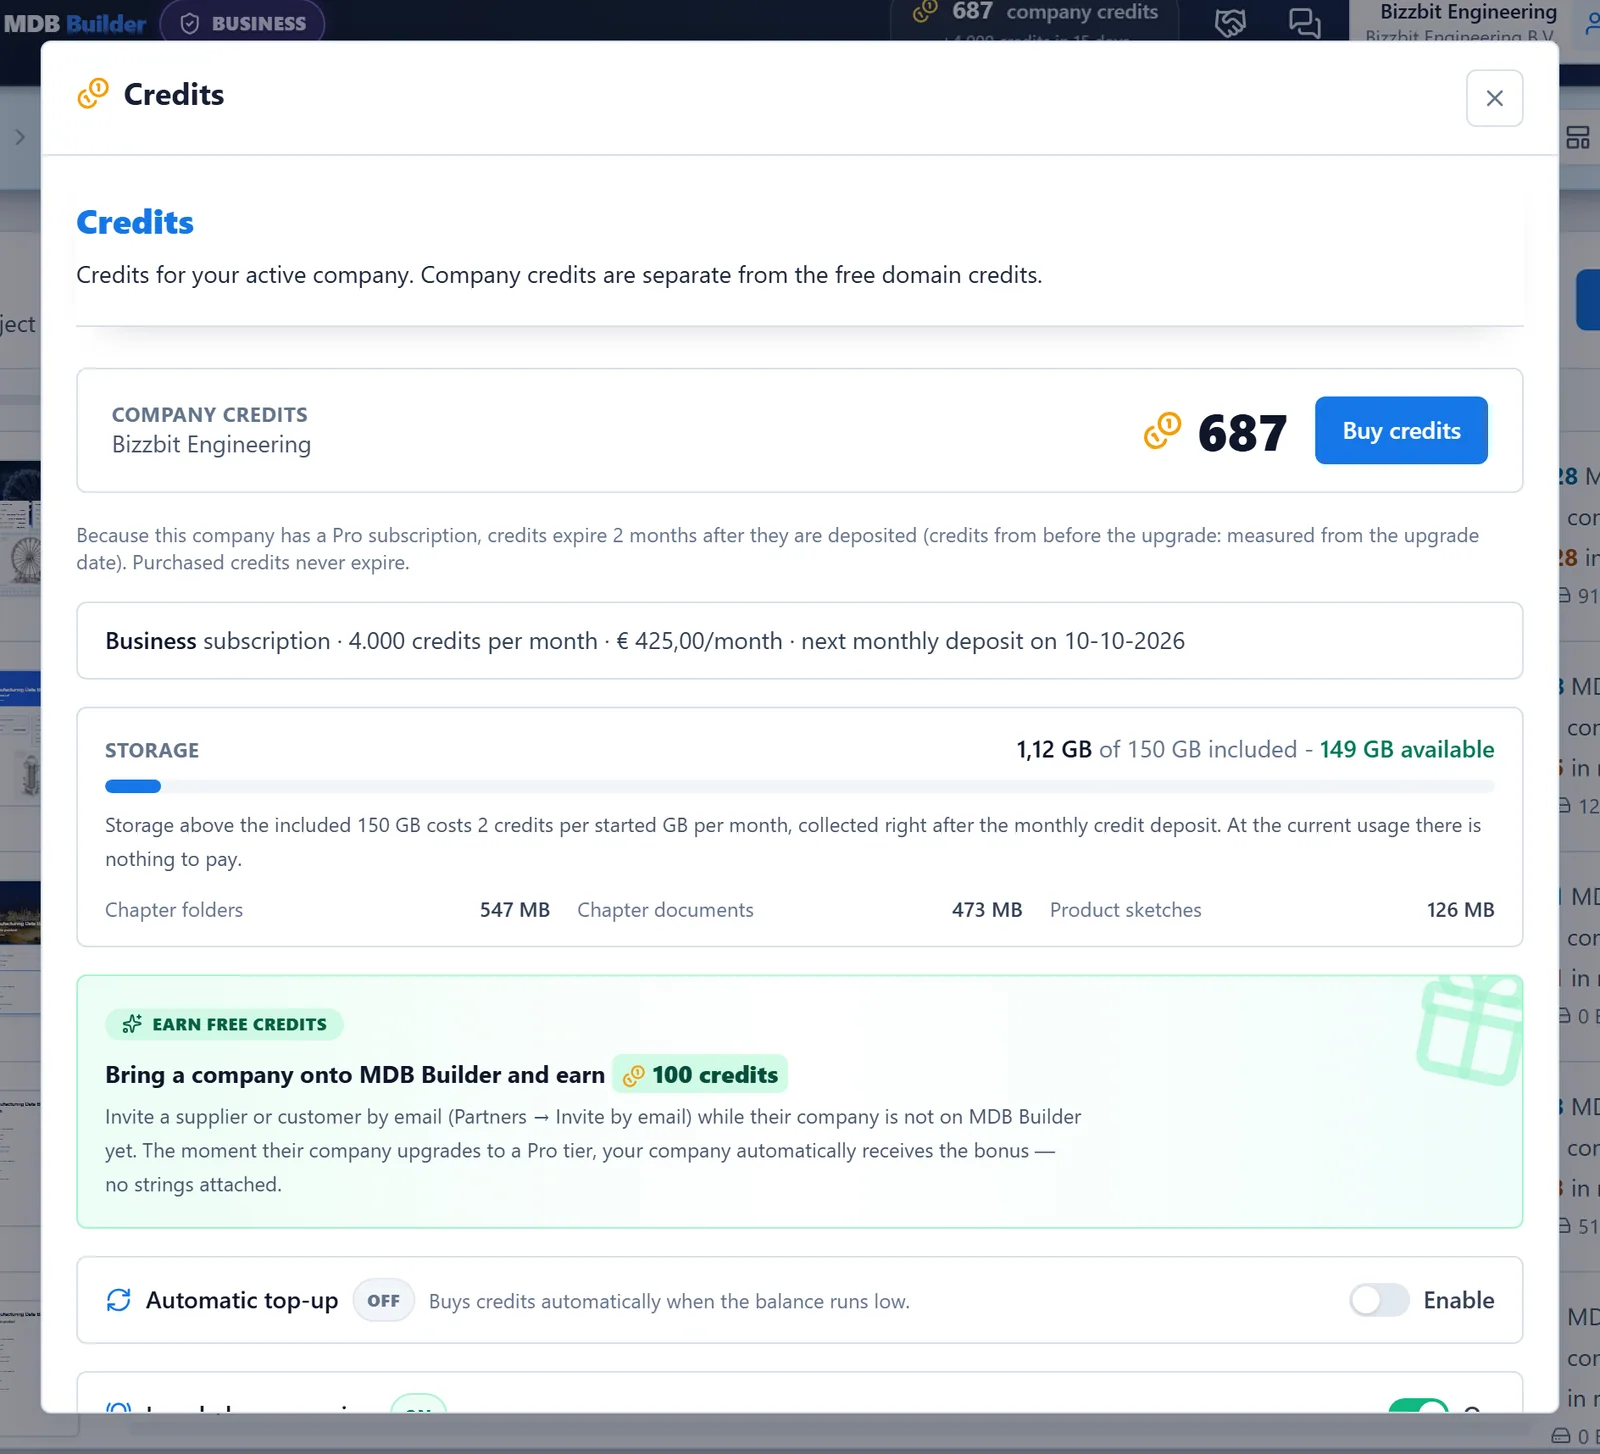
The window shows:
- The balance and whose it is. Each company and each department has its own credits. In your private workspace you use the Domain credits: free credits for everyone on your email domain who works in a private workspace.
- When credits expire. Purchased credits never expire. Credits in a company without Pro don't expire either. On the Pro plan, credits expire a set number of months after they are deposited; the window states the exact period. A yearly credit pot stays valid for the whole paid year.
- Your subscription, on the Pro plan: the credits per month or per year, and the date of the next deposit.
- Storage: how much your workspace stores, broken down by type, and how much is included in your plan. See Storage.
2. Buy credits#
Click Buy credits. On the Pro plan only admins can buy credits for the company.
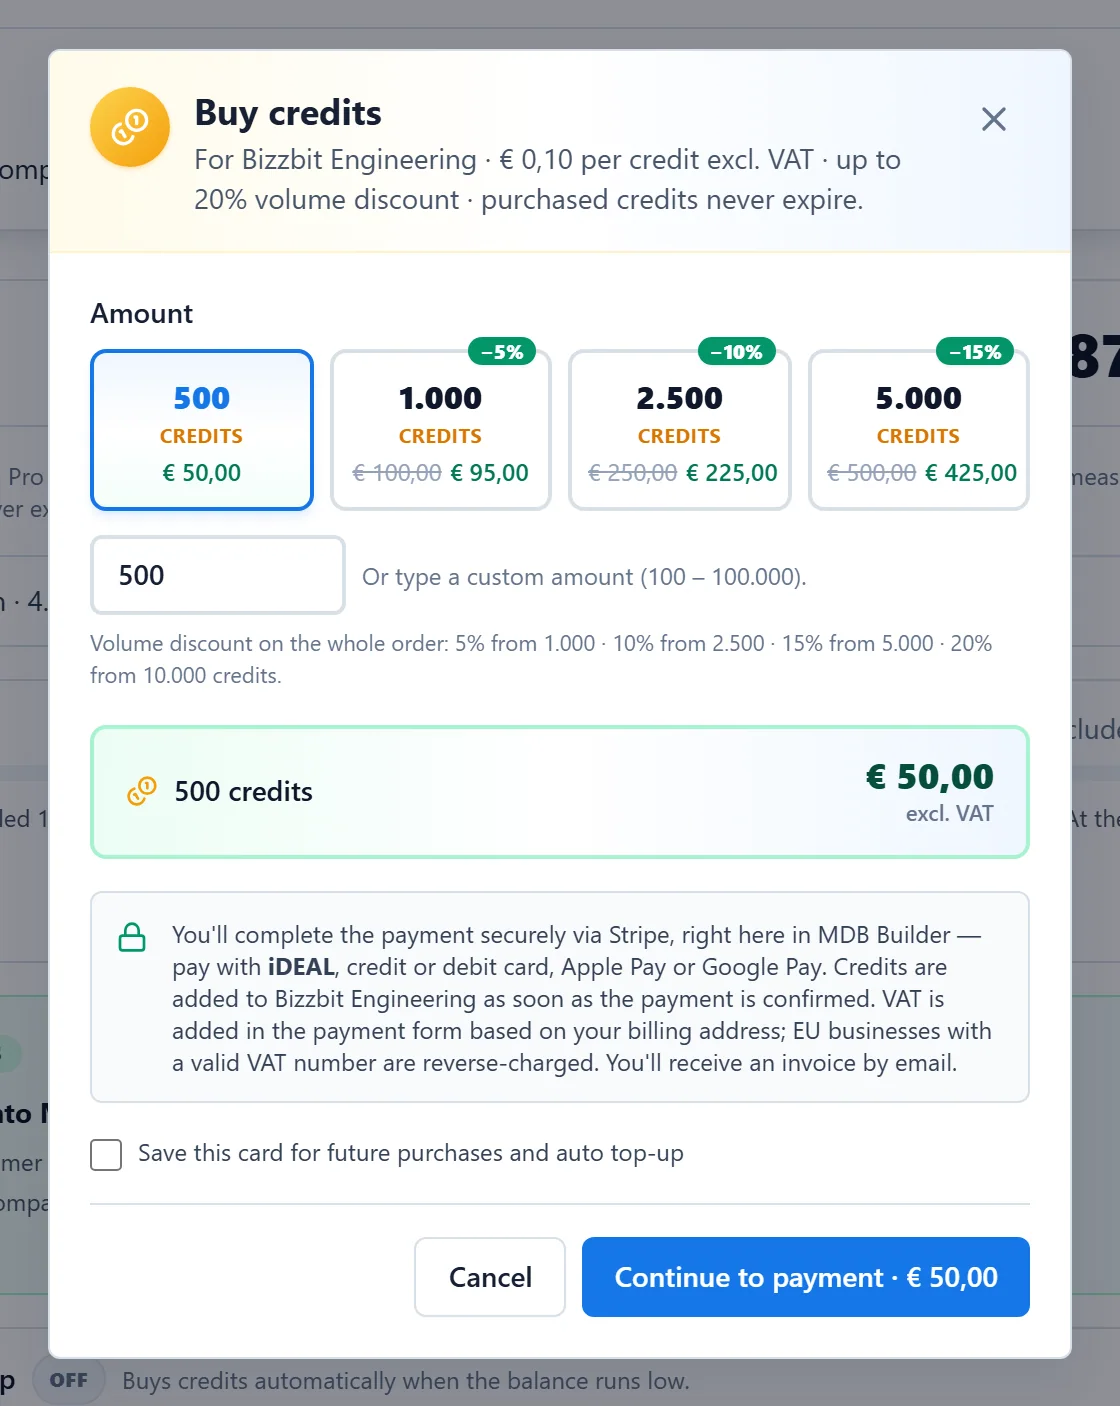
- Pick one of the amounts, or type your own.
- Check the summary. A volume discount applies to the whole order. If a few more credits would give you a bigger discount, MDB Builder suggests it with a Make it … button.
- Optionally tick Save this card for future purchases and auto top-up.
- Click Continue to payment. The payment form opens inside MDB Builder.
You pay with iDEAL, a credit or debit card, Apple Pay or Google Pay (in US dollars: card, Apple Pay or Google Pay). Prices are excluding VAT; the payment form adds the VAT based on your billing address. The credits are added as soon as the payment is confirmed, and you receive an invoice by email.
3. Turn on automatic top-up#
With Automatic top-up, MDB Builder buys a fixed bundle of credits whenever the balance drops below a floor you set.
- Switch on Enable next to Automatic top-up.
- Set the Floor (top up below this balance) and the Top-up amount (credits per top-up). The blue line underneath shows what one top-up costs, including the volume discount.
- Click Save automatic top-up.
A top-up is charged to the default payment method of the workspace. Save one with the tick box when you buy credits, or add one on the Billing tab. If your balance is already below the floor, the first top-up runs right after saving.
If a payment fails, automatic top-up pauses and the window shows Automatic top-up is paused — action needed. Click Pay the open invoice, or update your payment method and switch automatic top-up back on.
4. Set a low-balance warning#
The Low-balance warning emails a warning as soon as the balance drops below the level you choose, with a button to top up straight away.
- Switch the warning on.
- Enter the level under Warn below.
- Click Save warning.
Who gets the email depends on the workspace:
| Workspace | Recipients |
|---|---|
| Company on the Pro plan | The billing email address and all admins |
| Company without Pro | Everyone in the company |
| Private workspace (domain credits) | Everyone who paid for this pot before |
Keep the warning on next to automatic top-up. It is the safety net for when a payment fails.
5. Look up the history#
At the bottom of the Credits window, click Open history & billing.
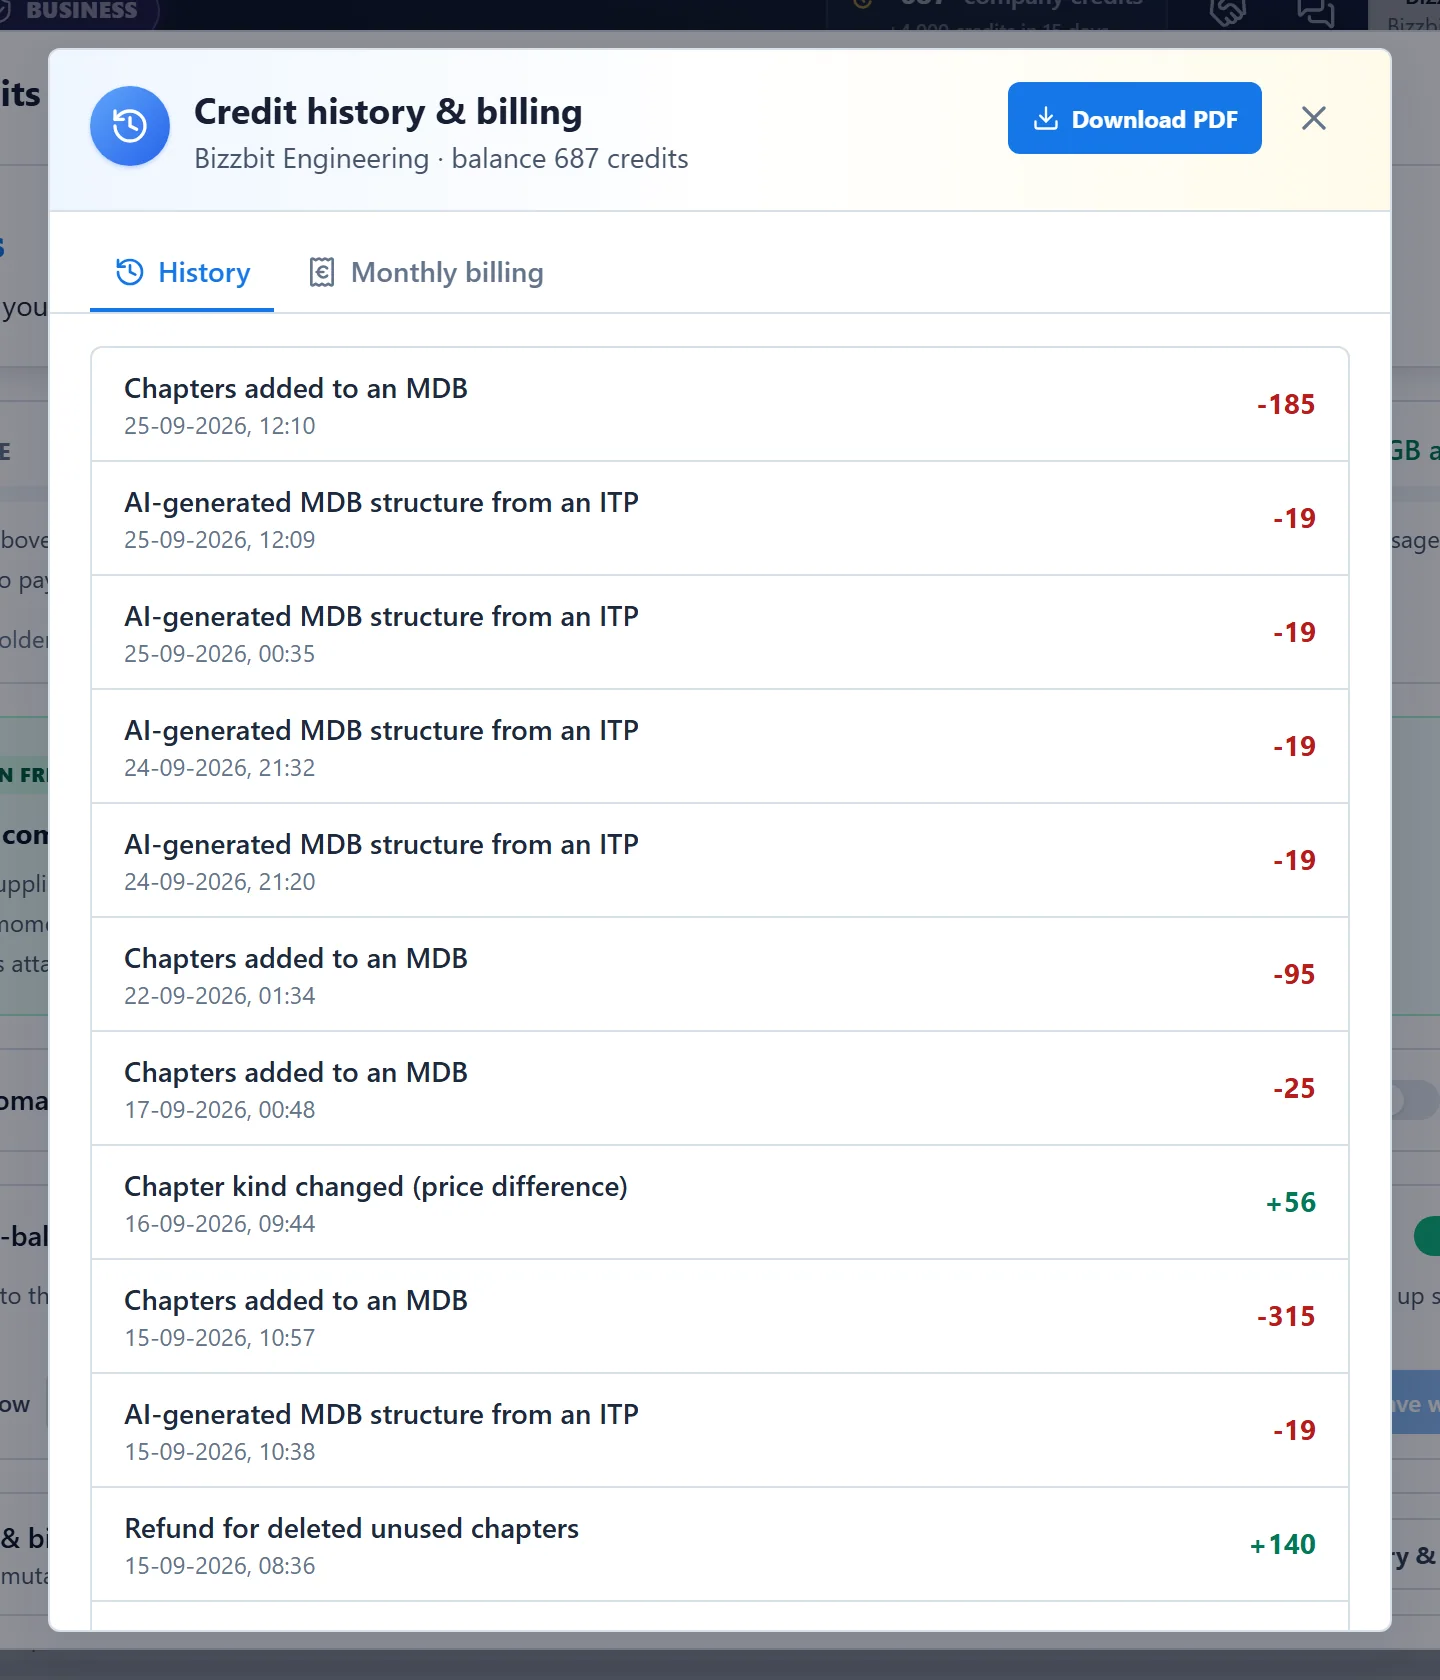
- History lists every movement: deposits in green, spending in red. Each line says what it was, for example Chapters added to an MDB, MDB exported, Monthly credits from your Pro subscription, Purchased credits or Expired credits, with the date and, for purchases, the amount paid.
- Monthly billing groups the movements by month. Per month you see the paid charges, the credits deposited and the credits spent or expired. Free grants and spending without a charge are folded away under a line of their own.
- Download PDF gives you the same overview as a statement, for example for your finance department.
Storage#
Uploads use storage. The storage bar in the Credits window compares what you store with what your plan includes.
- On the Pro plan storage is never blocked. Storage above the included amount is charged in credits per started GB per month, right after the monthly credit deposit. The window shows the next charge. If that charge can't be collected, you get a grace period; after it, new uploads are paused until the outstanding credits are paid.
- Without Pro your workspace has a fixed storage limit. Nothing is deleted when you reach it, but new uploads are blocked.
Other ways to get credits#
- Earn free credits: when the Credits window shows this panel, invite a supplier or customer by email while their company isn't on MDB Builder yet. When their company upgrades to a Pro tier, your company receives a bonus. The panel shows your invites and what they earned.
- Request extra free credits: this form appears when your company started with a small, symbolic amount of credits. Explain why you need more; MDB Builder reviews the request.