This guide takes you from your first sign-in to a first MDB with a chapter structure and documents in it. It takes about ten minutes. You don't need a company or a paid plan to follow along.
1. Sign in#
Go to app.mdbbuilder.com and choose how you want to sign in:
- Continue with Microsoft: your work or school account.
- Continue with Google: Google Workspace accounts only. Personal Gmail addresses are not accepted.
- Continue with e-mail: when Microsoft or Google sign-in is blocked by your IT department.

The first time you sign in, your free account is created. No credit card and no contract. Use your work email address: colleagues with the same email domain end up in the same company.
2. Your workspace, and optionally a company#
After signing in you work in your private workspace. On your own you can already do everything: create projects, build MDBs and share them with customers.
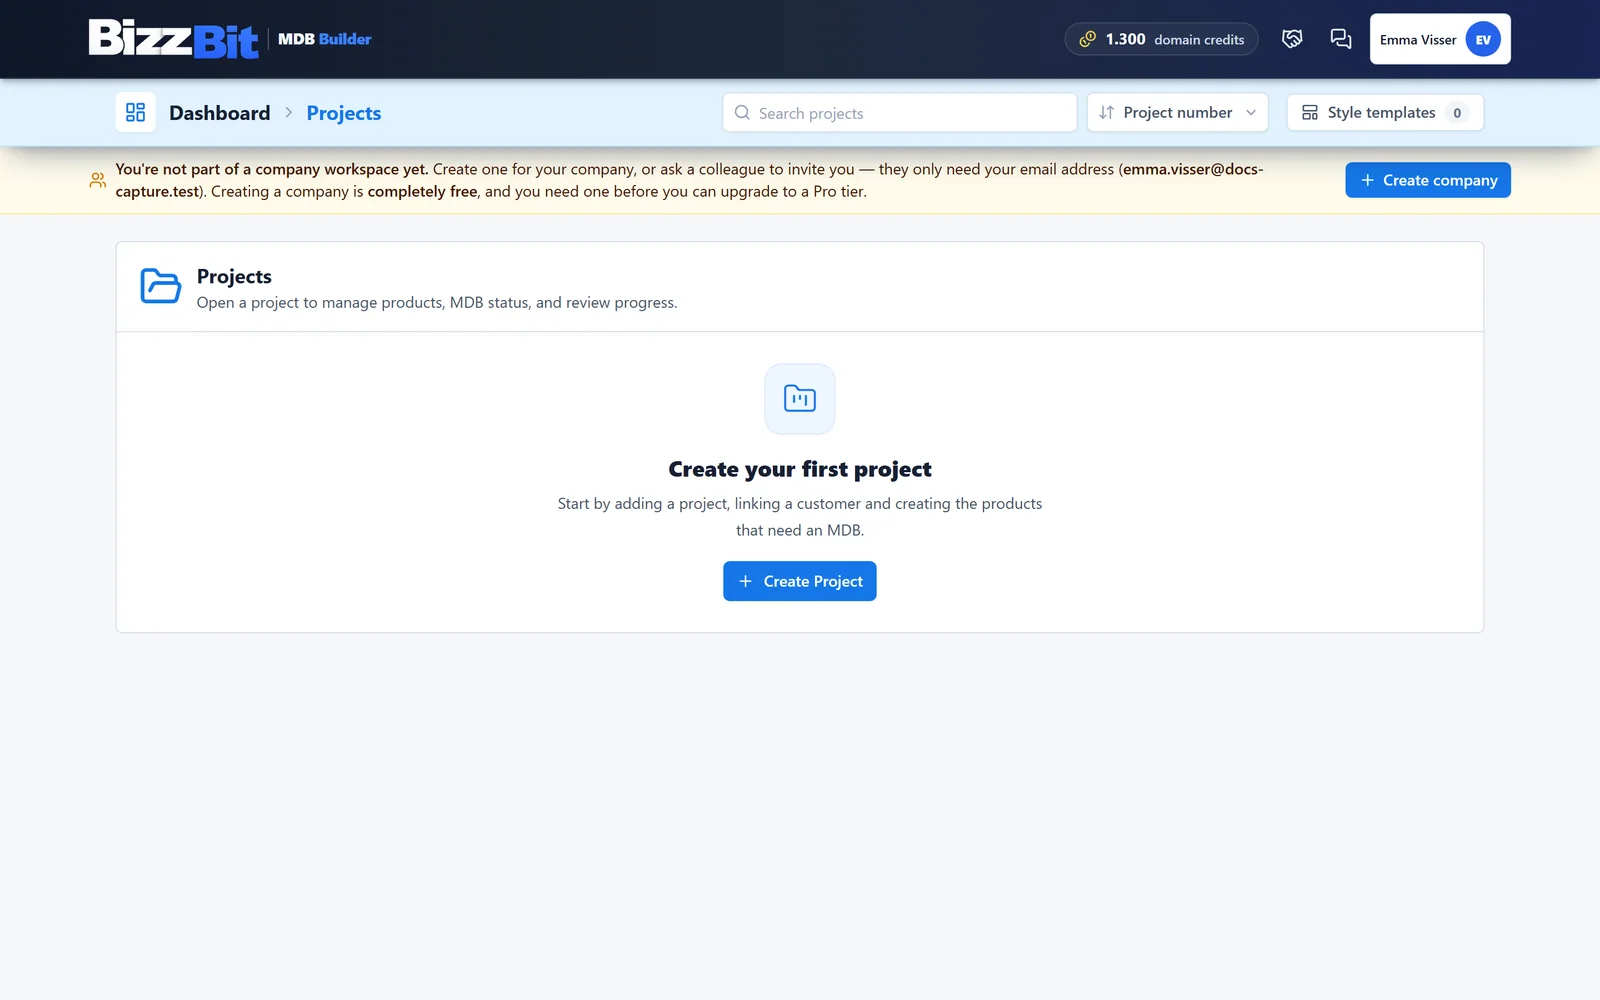
When you want to work together with colleagues, create a company workspace with Create company. The wizard has three steps: Company (who you are), Profile (how others see you) and Members (invite colleagues on your email domain). Create a company explains each step and what a company is.
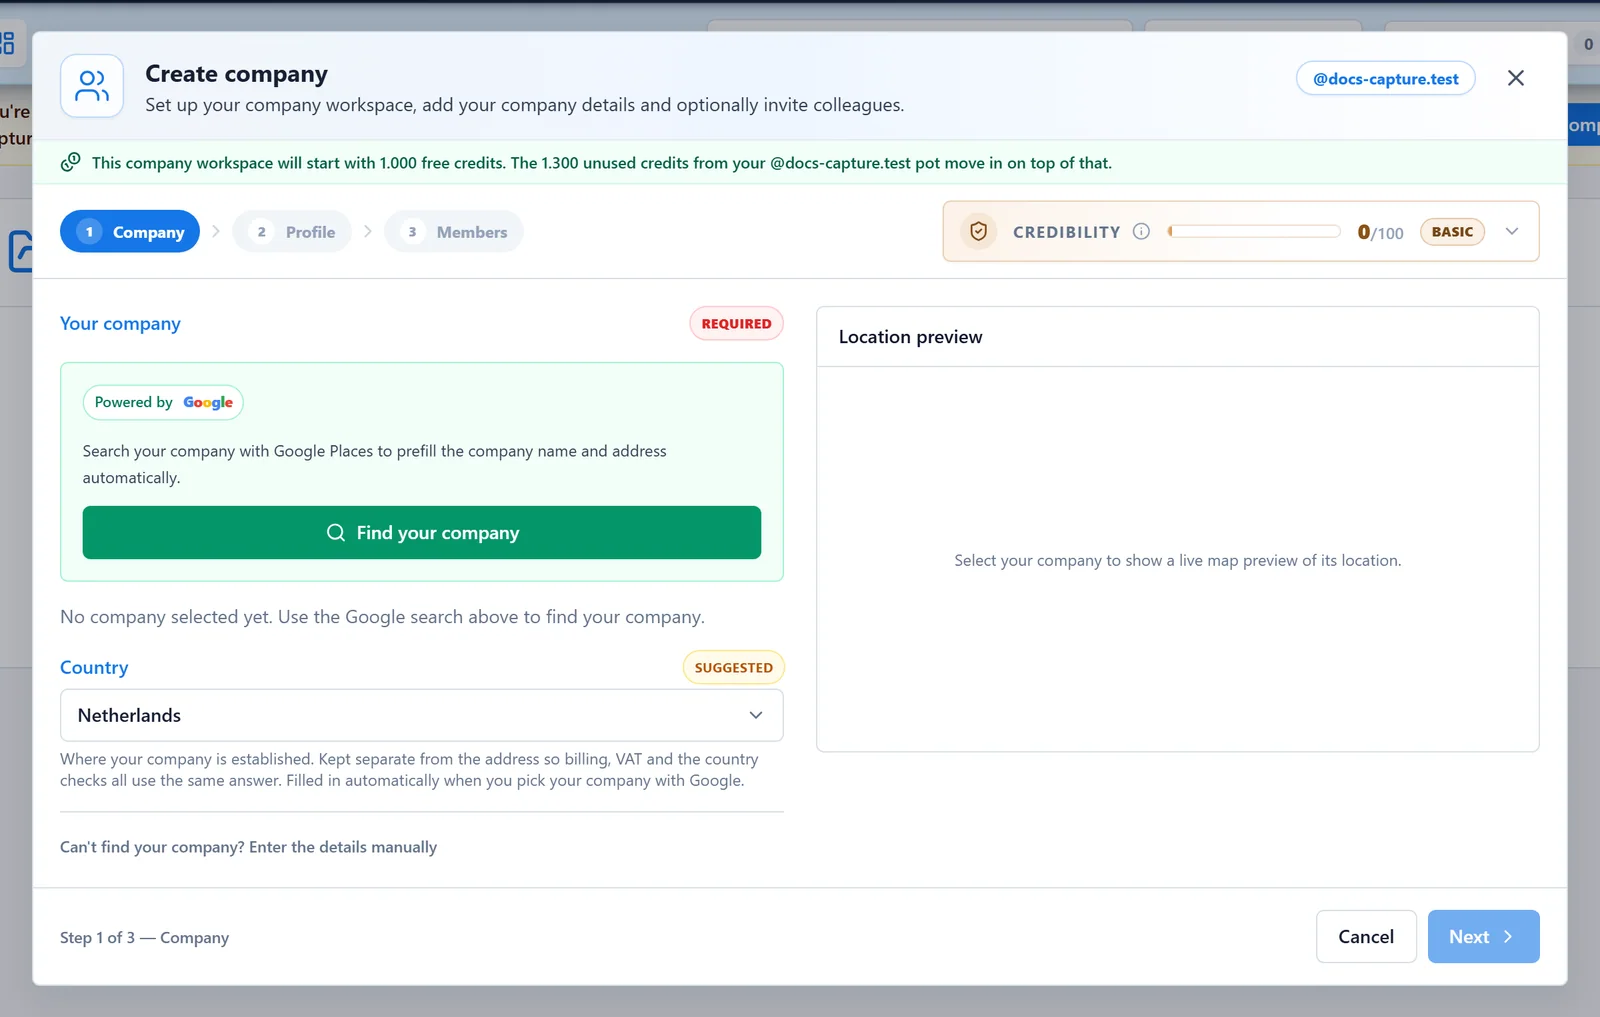
In a new company all members have the same rights. Admins come with the Pro plan. Your private workspace stays where it is.
3. Create the project#
A project holds the work for one customer order. Click Create Project and fill in:
| Field | What it is for | |
|---|---|---|
| Project number | Required | The unique project identifier used in documents and exports. |
| Project name | Required | A readable name, for example the equipment or the site. |
| Customer | Optional | Search your customers or type a new name to add it. |
| More project details | Optional | Customer project number, PO number, requisition and contract number, site, and fields of your own. |
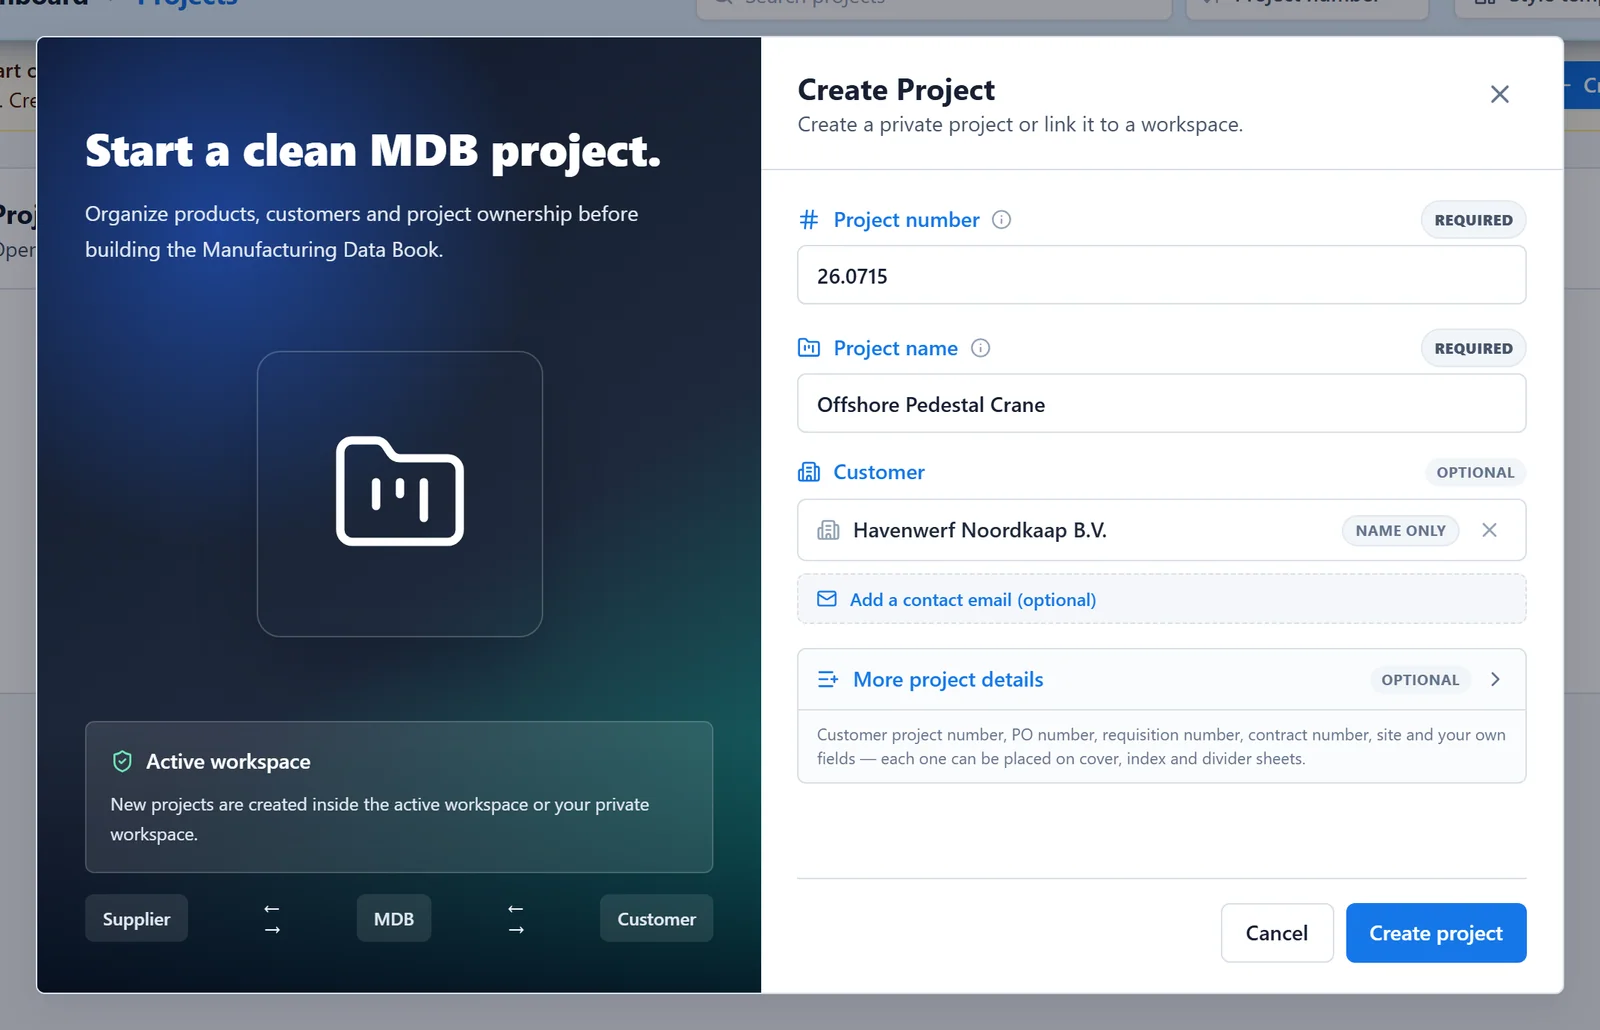
Click Create project.
4. Add the first product#
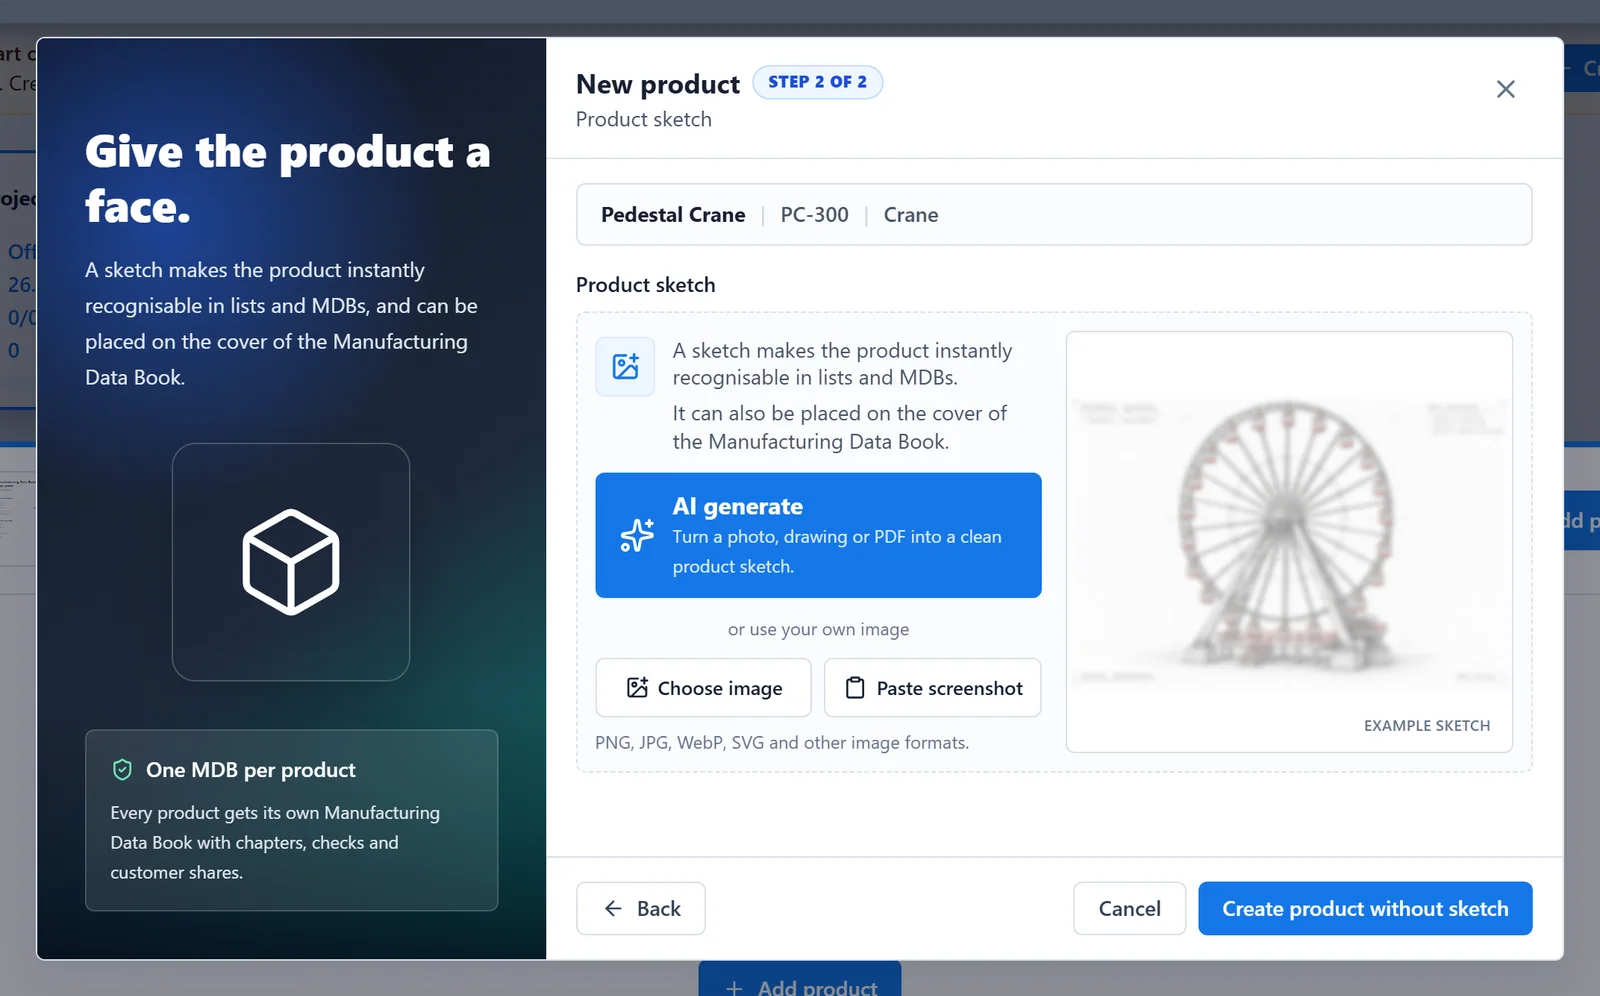
Every product in a project gets its own Manufacturing Data Book. Your new project is still empty, so click Add product. The New product window has two steps.
Step 1: Product details. Only Product name is required. You can also add:
- Tag number and Type of the product.
- More product details: the MDB document number, serial number, drawing number, design code, dates and your own fields. Tag numbers and MDB document numbers must be unique within the project.
- Deliver in multiple units: for a product you deliver more than once, such as twelve identical pumps. MDB Builder then numbers the units for you.
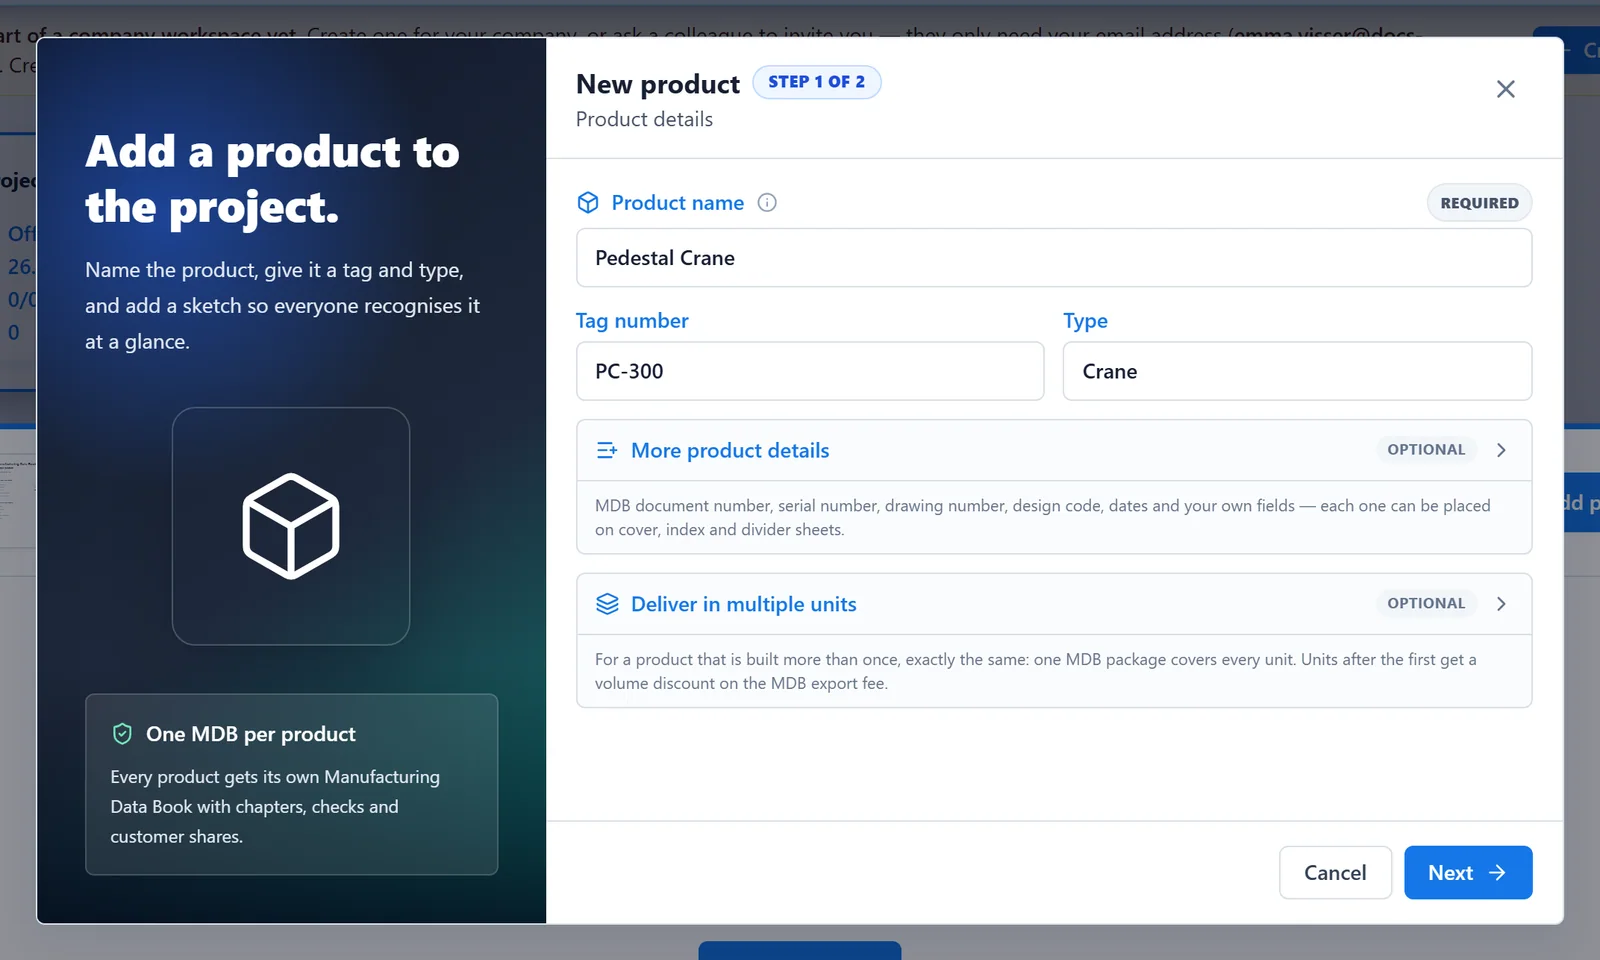
Click Next.
Step 2: Product sketch. A sketch makes the product recognisable in lists and MDBs, and can go on the cover of its MDB. Click AI generate to turn a photo, drawing or PDF into a clean product sketch, or use your own image with Choose image or Paste screenshot. This step is optional: click Create product without sketch to skip it.
MDB Builder creates the product and opens its MDB.
5. Set up the chapter structure#
A new MDB opens in structure editing mode. The cover (CVR) and the index (IDX) are already there. There are three ways to add the chapters:
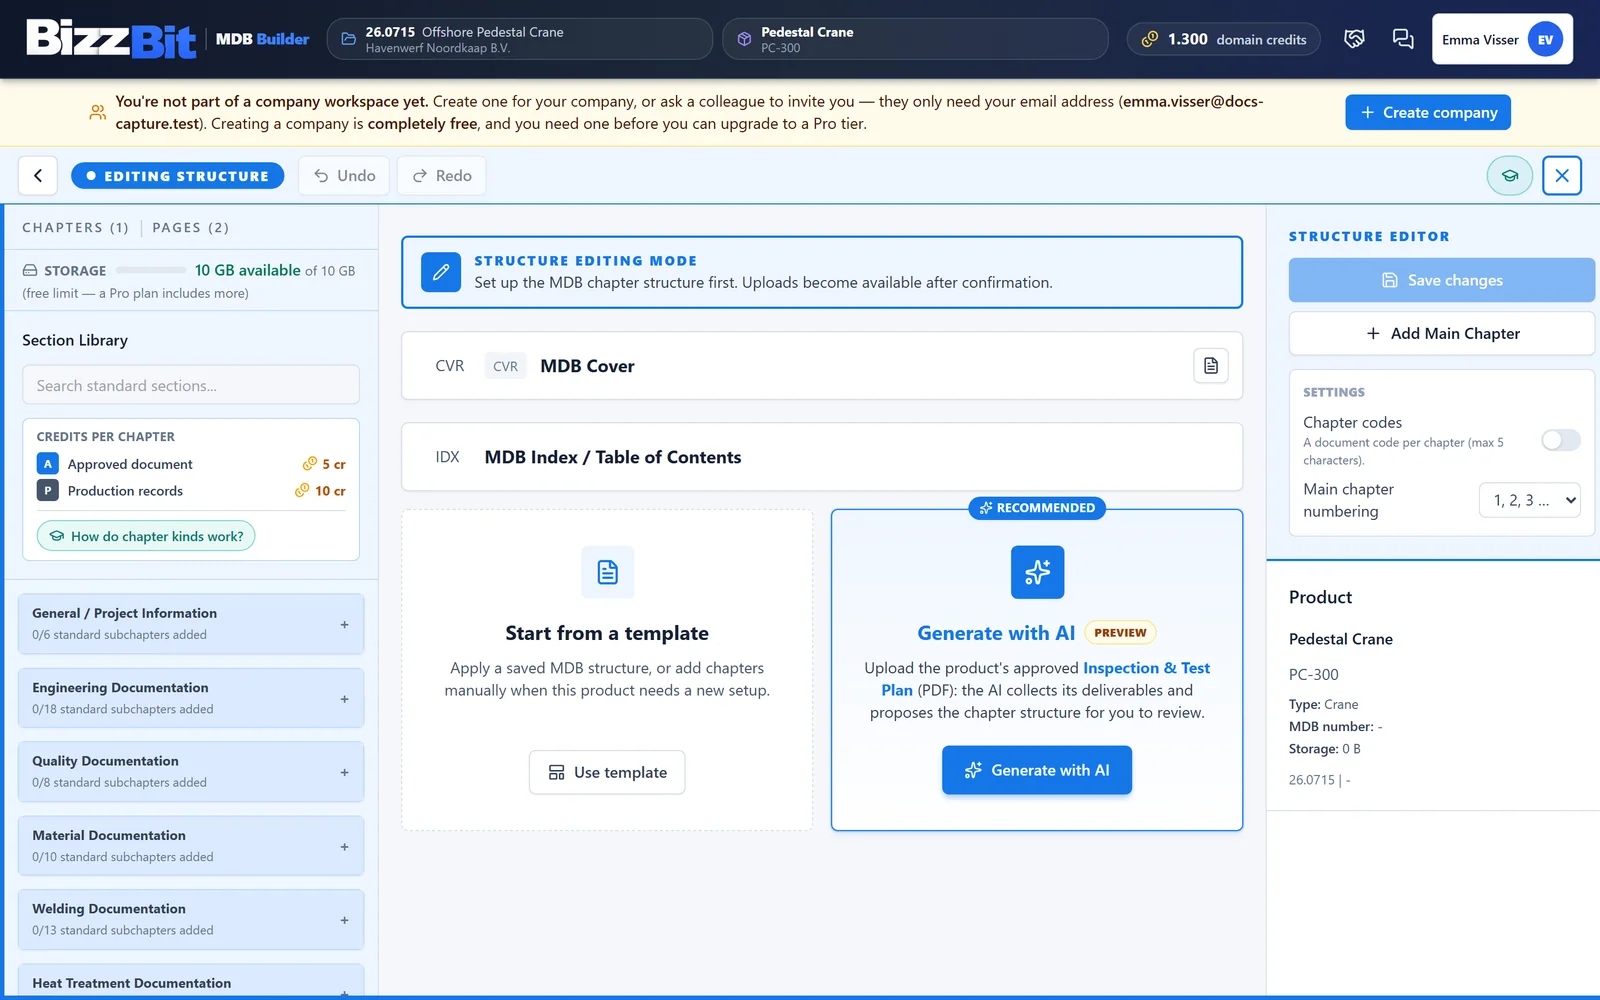
- Generate with AI (recommended): upload the product's approved Inspection & Test Plan as a PDF. The AI collects the deliverables from the ITP and proposes a chapter structure for you to review.
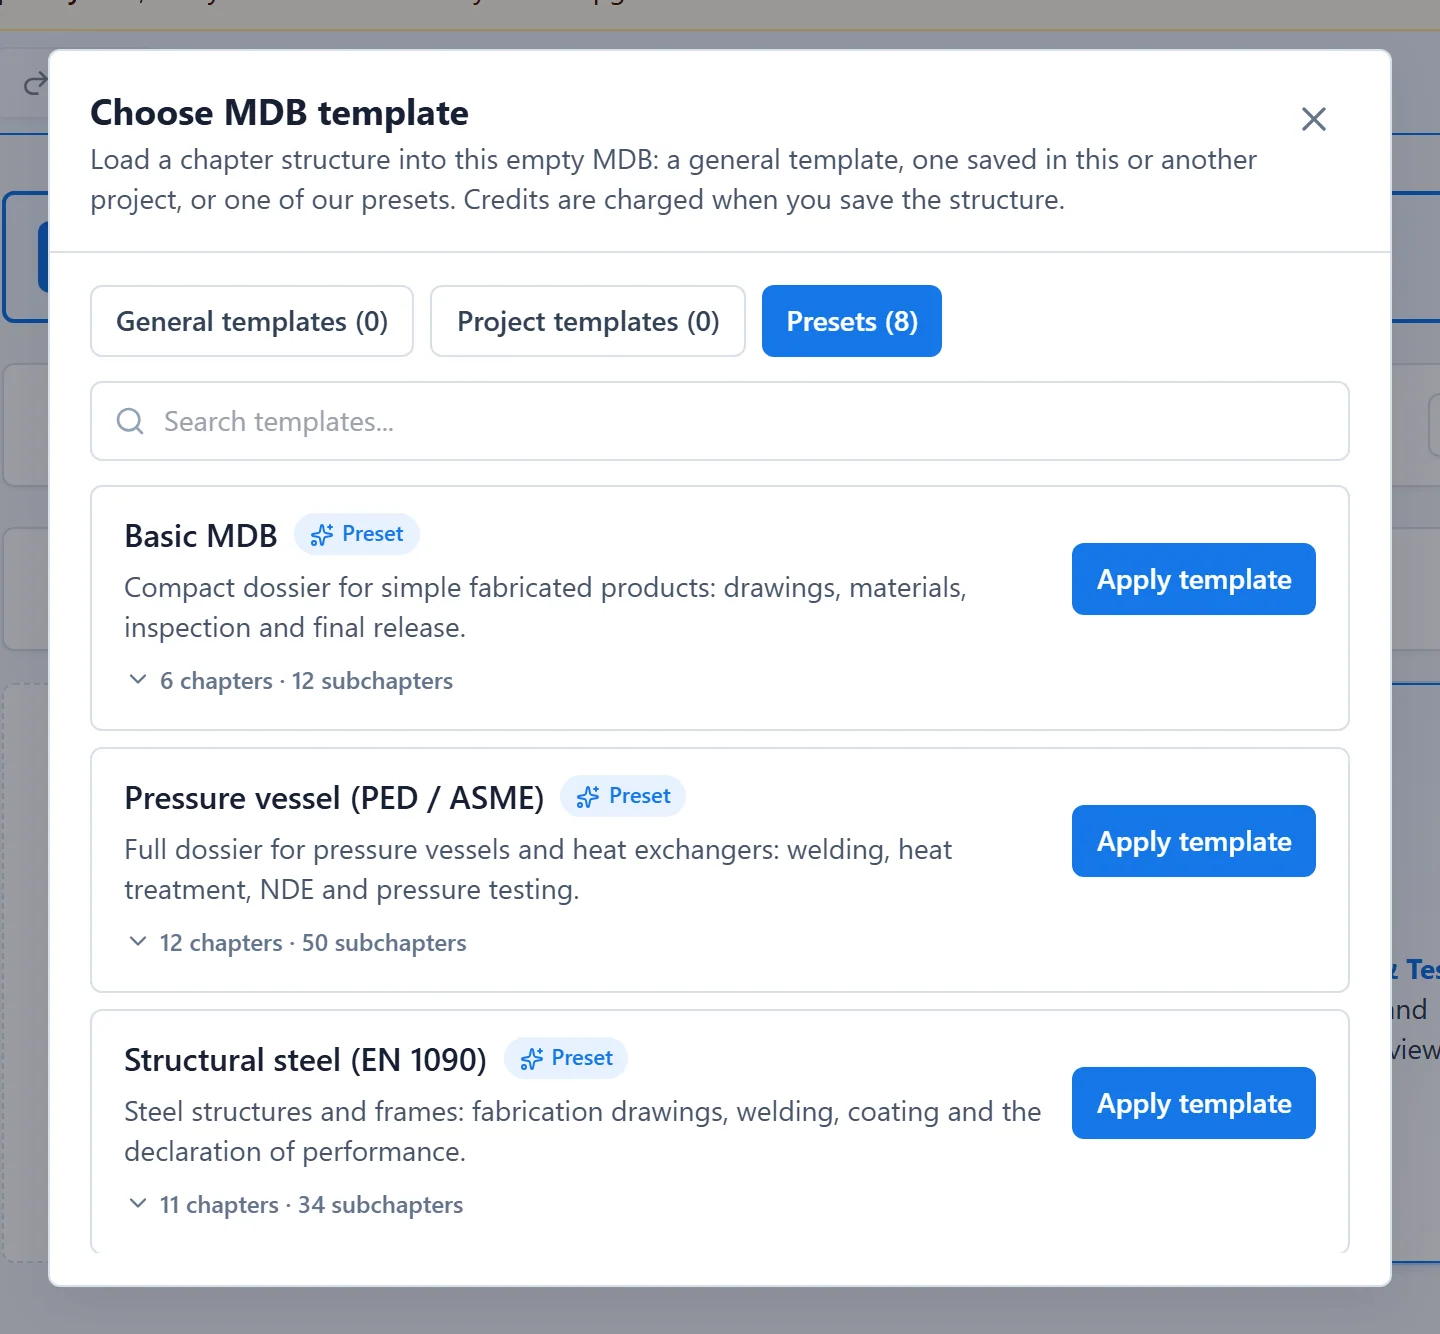
- Start from a template: click Use template, pick a structure under General templates, Project templates or Presets, then click Apply template.
- Build it yourself: add standard chapters from the Section Library on the left, or click Add Main Chapter, give it a Chapter title and click Create chapter. Use Subchapter on a chapter to add levels below it.
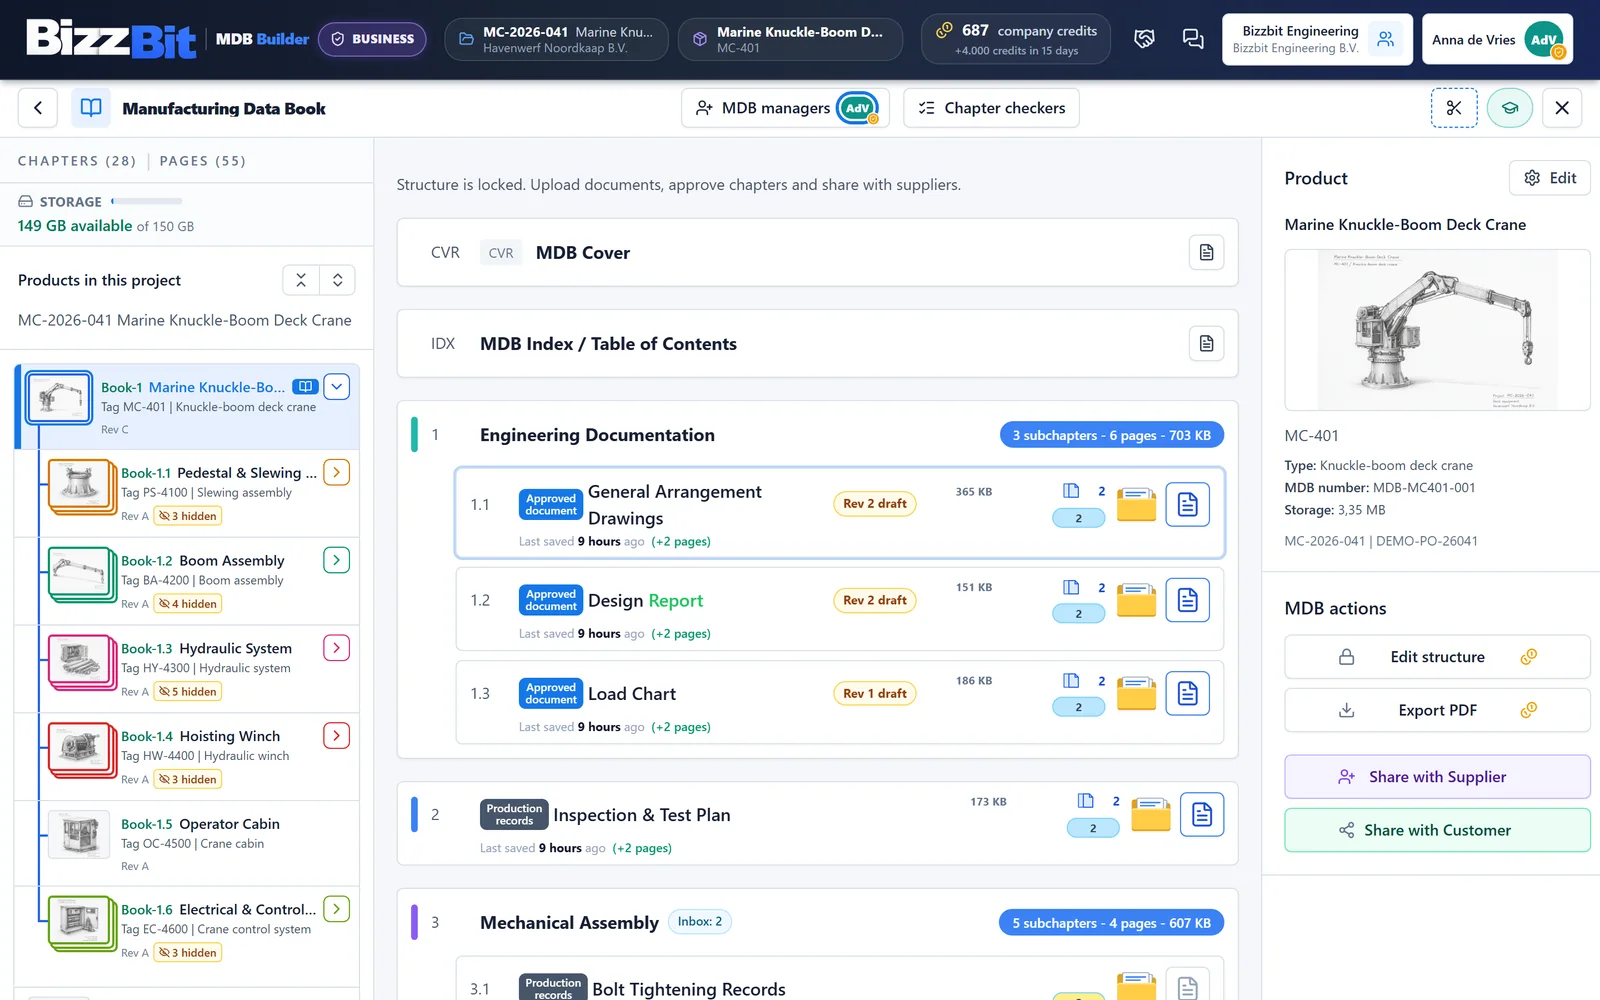
Each chapter is one of two kinds. An Approved document chapter holds one approved PDF, such as a drawing or a procedure. A Production records chapter collects the records you gather during manufacturing, with internal checks before release. See Chapters for more about the difference.
When the structure is right, click Save changes.
You can change the structure later with Edit structure.
6. Add documents#
Now fill the chapters:
- Drag a PDF onto a chapter in the list and choose Add to chapter or Add to chapter folder.
- Open a chapter and drop PDFs on it, click to select several files, or paste with Ctrl+V.
- Got one big PDF with everything in it? Use Split PDF over chapters in the top bar to divide its pages over the chapters in one go.
For an Approved document chapter, you enter the revision of the document when you upload it.
What's next#
Once the documents are in, a chapter follows the same route every time: Mark complete, Internal check, Release and finally Customer review. Complete, check and release explains each step. To send the finished data book to your customer, see Share an MDB with your customer.