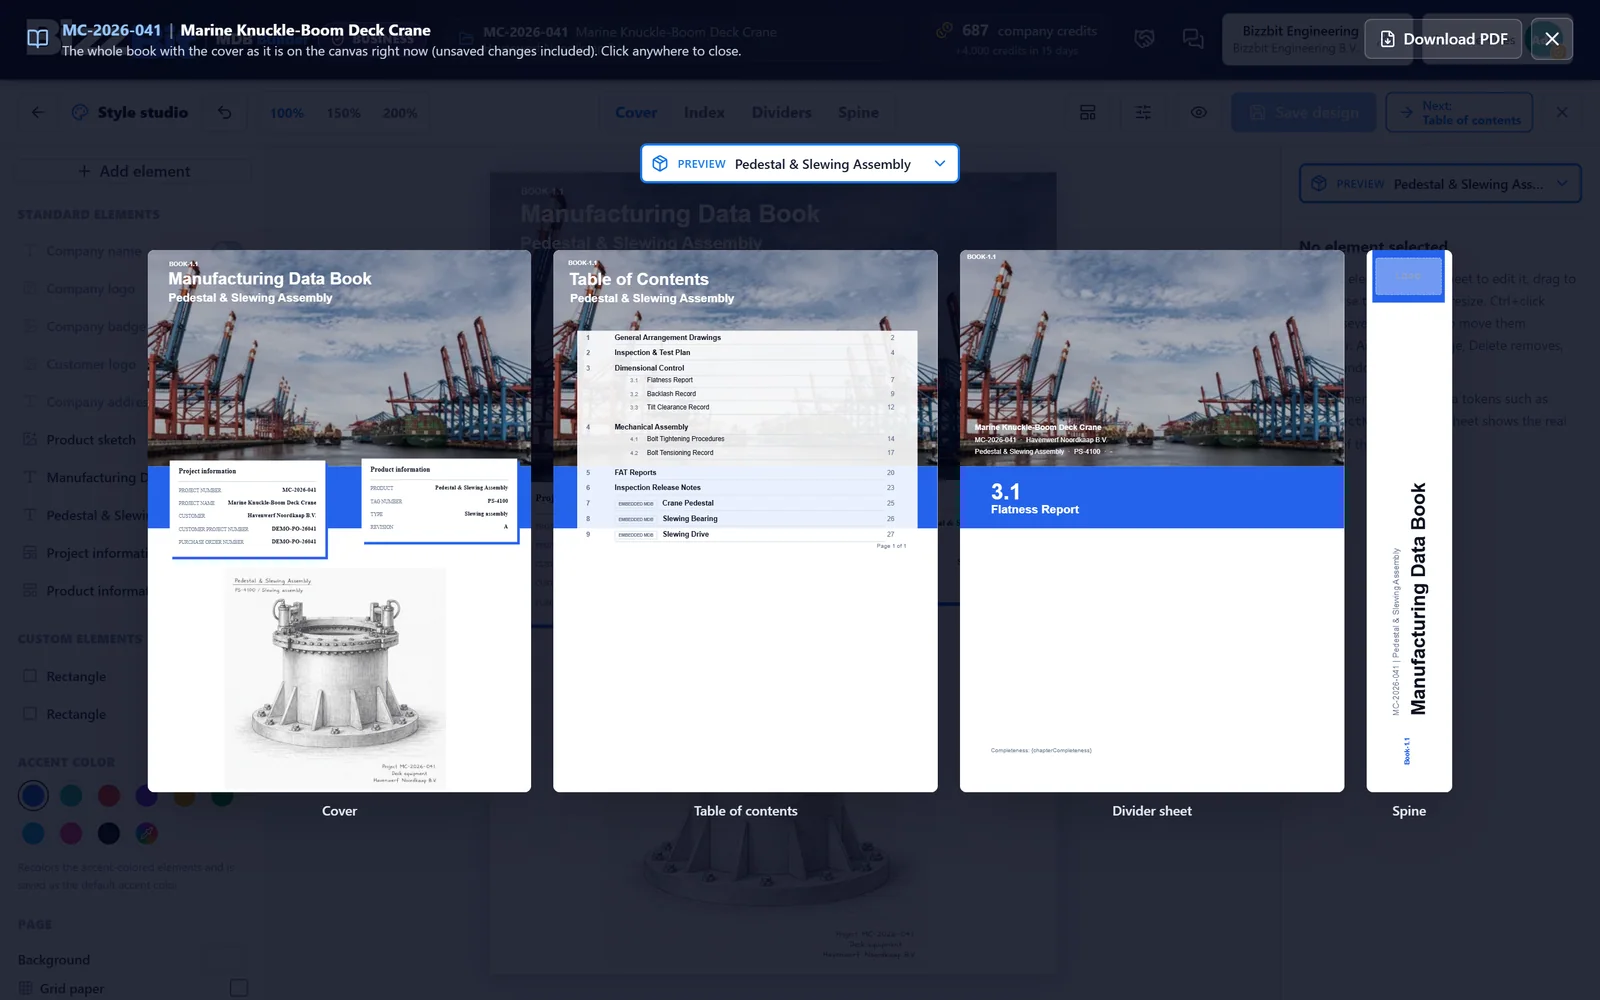
The style of an MDB belongs to its project: the cover, the table of contents (index), the divider sheets and the binder spine look the same for every product in the project. You design them once in the Style Studio, and every save applies to all MDBs of the project. The data on the sheets, such as the product name, tag number and book number, is filled in per MDB.
1. Open the Style Studio#
The Style Studio opens by itself right after you create a project, with the Templates window on top so you can pick a look straight away. To open it later:
- With the project open, click the paintbrush on the Project card at the top of the page.
- In the projects list, click Edit projects and then the paintbrush on the project's row.
- Or click the small cover of a project in the list to see its whole book, and click Open in Style Studio.
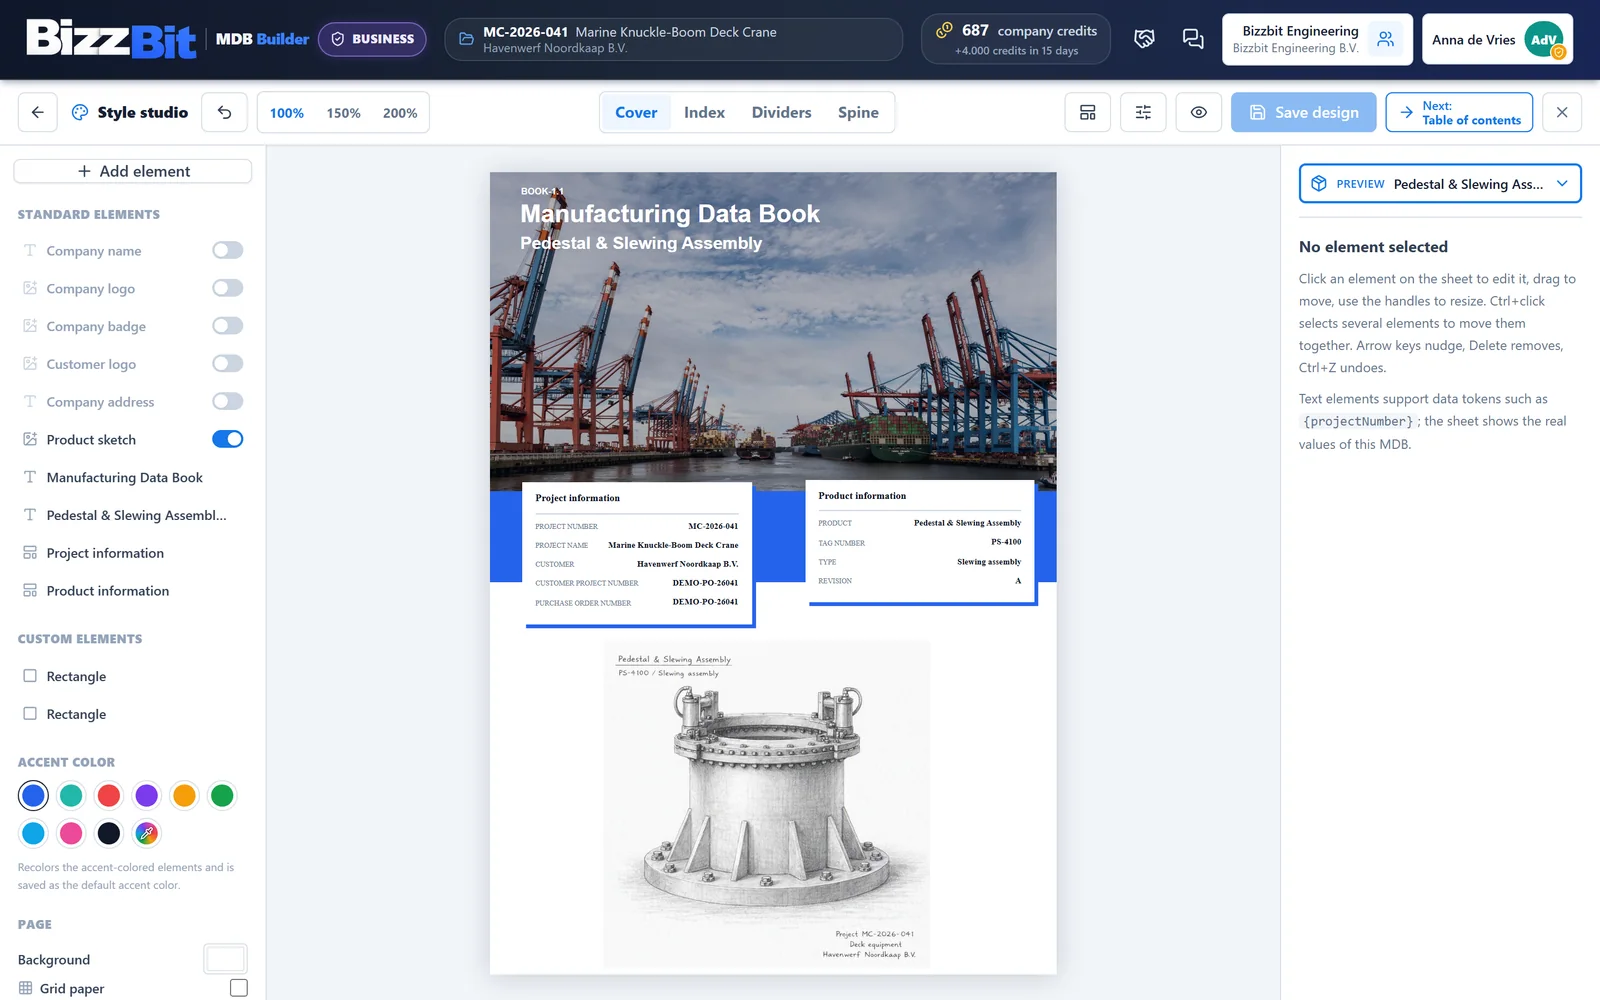
The bar at the top holds the sheet tabs Cover, Index, Dividers and Spine. Hover over the tabs to see all four sheets side by side. On the left you find Add element and the elements of the sheet; on the right the properties of the element you select.
2. Start from a template or preset#
Click Templates in the top bar. The window lists, from top to bottom:
- Company templates: styles your company saved for all projects.
- Templates from another project…: pick a project to reuse its saved style.
- Presets: ready-made designs in six themes: Business, Green, Bold, Industrial, Drafting and Minimal. On the index and divider sheets you also get the Classic layouts.
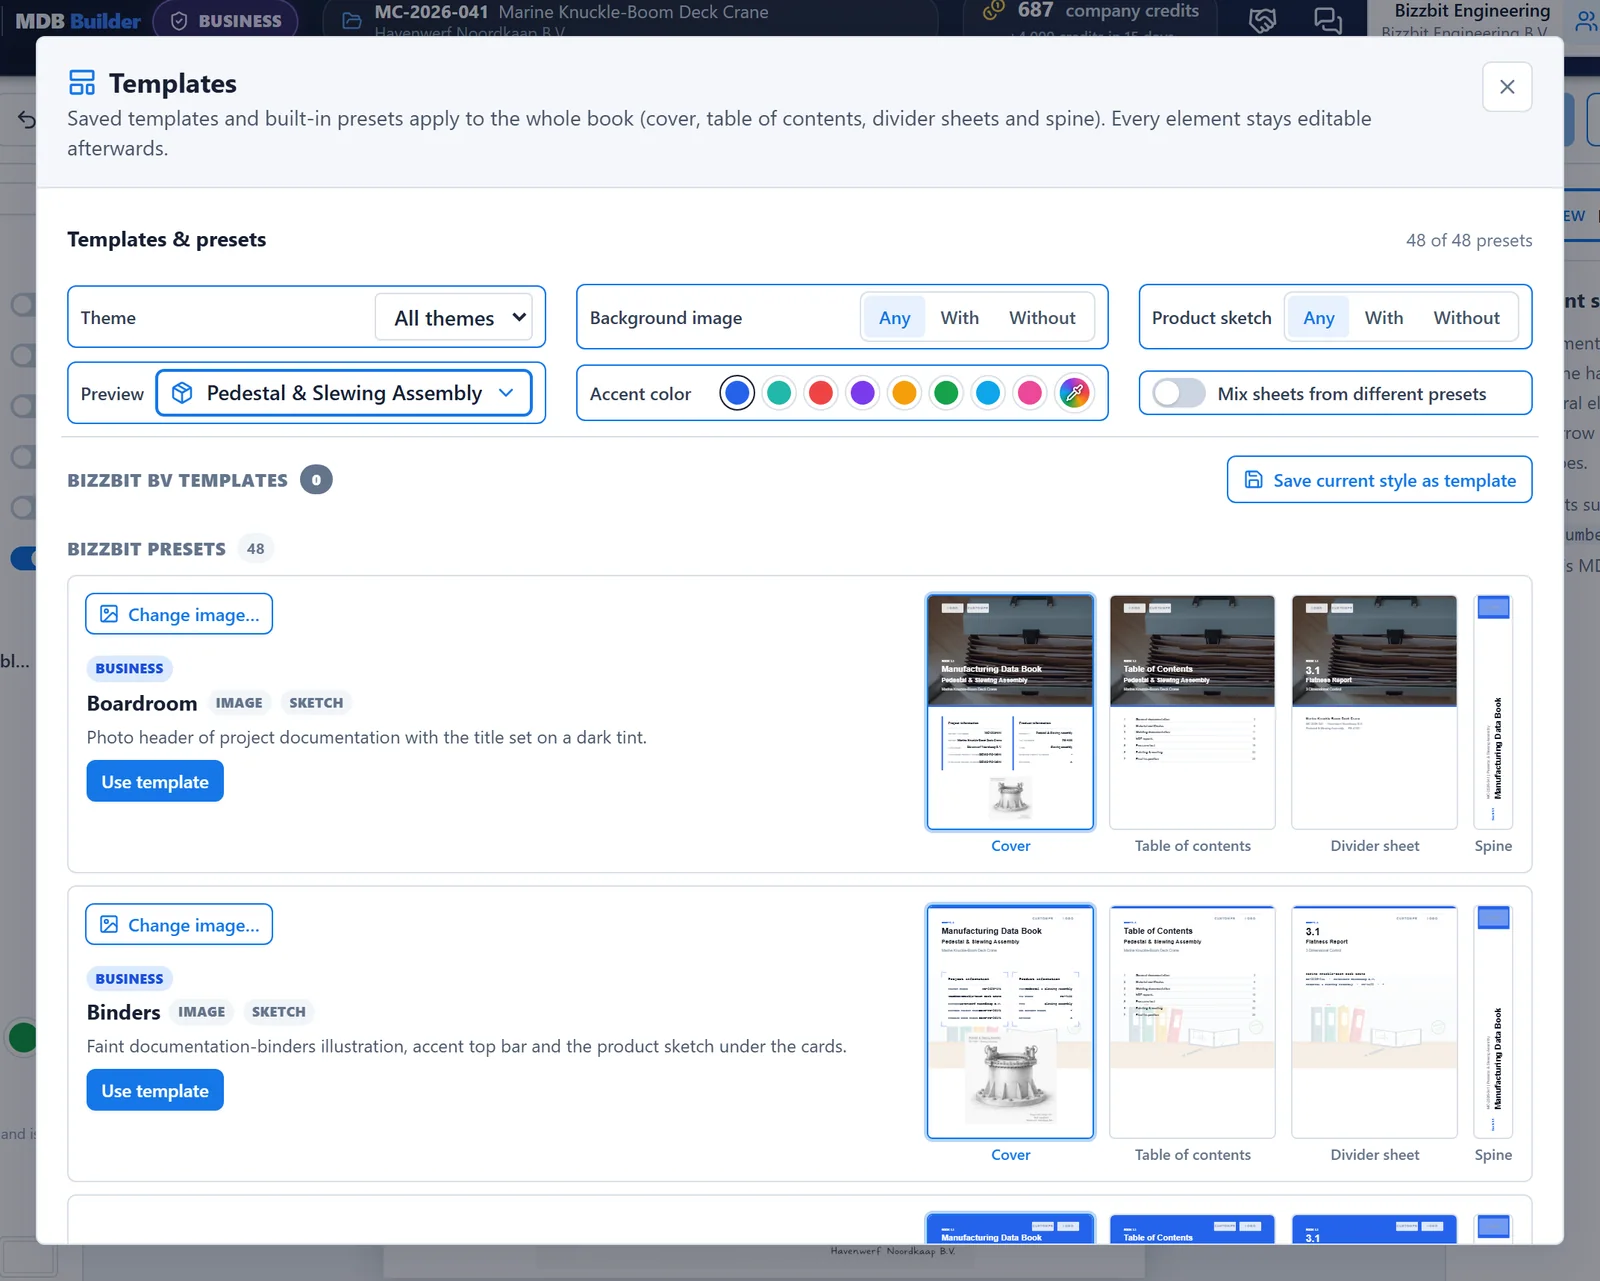
Narrow the list with the theme list and the Background image and Product sketch filters (Any, With, Without). Try colours with Accent color, and use Preview with to see the miniatures with the data of one of your products. Click a miniature to see it full screen.
Click Use template to apply a preset or template to the whole book. It is saved right away. If a sheet already has a design of its own, MDB Builder first asks Replace the current design?
More options in the same window:
- Change image… on a preset with a background image: pick another picture from the image library for it.
- Mix sheets from different presets: combine, for example, the cover of one preset with the dividers of another, then click Use this combination.
- Save current style as template: store the style of this book under a Template name. It is saved for this project. If you may manage company templates, tick Make this a general template, company-wide instead of just this project. to offer it in every project of your company.
3. Design each sheet#
Every element on the sheet can be moved, resized and restyled. Click an element to select it and change it on the right.
Standard elements on the left are switched on or off with one click:
| Element | Notes |
|---|---|
| Company name | Your company's name |
| Company logo | Upload your logo in the company details first |
| Company badge | The badge of your company or department |
| Customer logo | The logo of the project's customer |
| Company address | Cover only |
| Product sketch | Cover only; shows the product's own sketch |
| Book number | The book number of the MDB, such as Book-1.2 |
With Add element you add a Text, Rectangle, Circle, Triangle, Line, Corner brackets, an Image from your computer or a picture from the Image library.
A text element can hold data tokens, such as the project number or the product name. They are replaced with the real values in every MDB. The fields you added under More project details and More product details are available as tokens too, so a serial number or a PO number can go on the cover.
The cover always carries the book title. Select it and pick a name under Content: Manufacturing Data Book (MDB), Manufacturing Record Book (MRB), Quality Dossier, Vendor Data Book (VDB) and more, or Custom title… to type your own.
Further settings on the left:
- Accent color: the main colour of the design.
- Divider colors: turn on Use the colors of the chapter to give every divider sheet the colour of its chapter.
- Binder spine: set the Spine width to fit your binders (on the Spine sheet).
- Page: the page background and grid colour.
Changes to elements are not saved automatically: the top bar shows Unsaved. Click Save design, or use the button Save and next: to save and go to the next sheet. On the last sheet it closes the Style Studio. Made a mistake? Click Undo or press Ctrl+Z.
4. Add pictures from the image library#
Choose Add element and then Image library to open ready-made illustrations and photos for covers and dividers, free to use in your MDBs. Filter by category and by style, and click a picture to place it. It lands as a faint page background behind the other elements; change its size, position and opacity on the right.
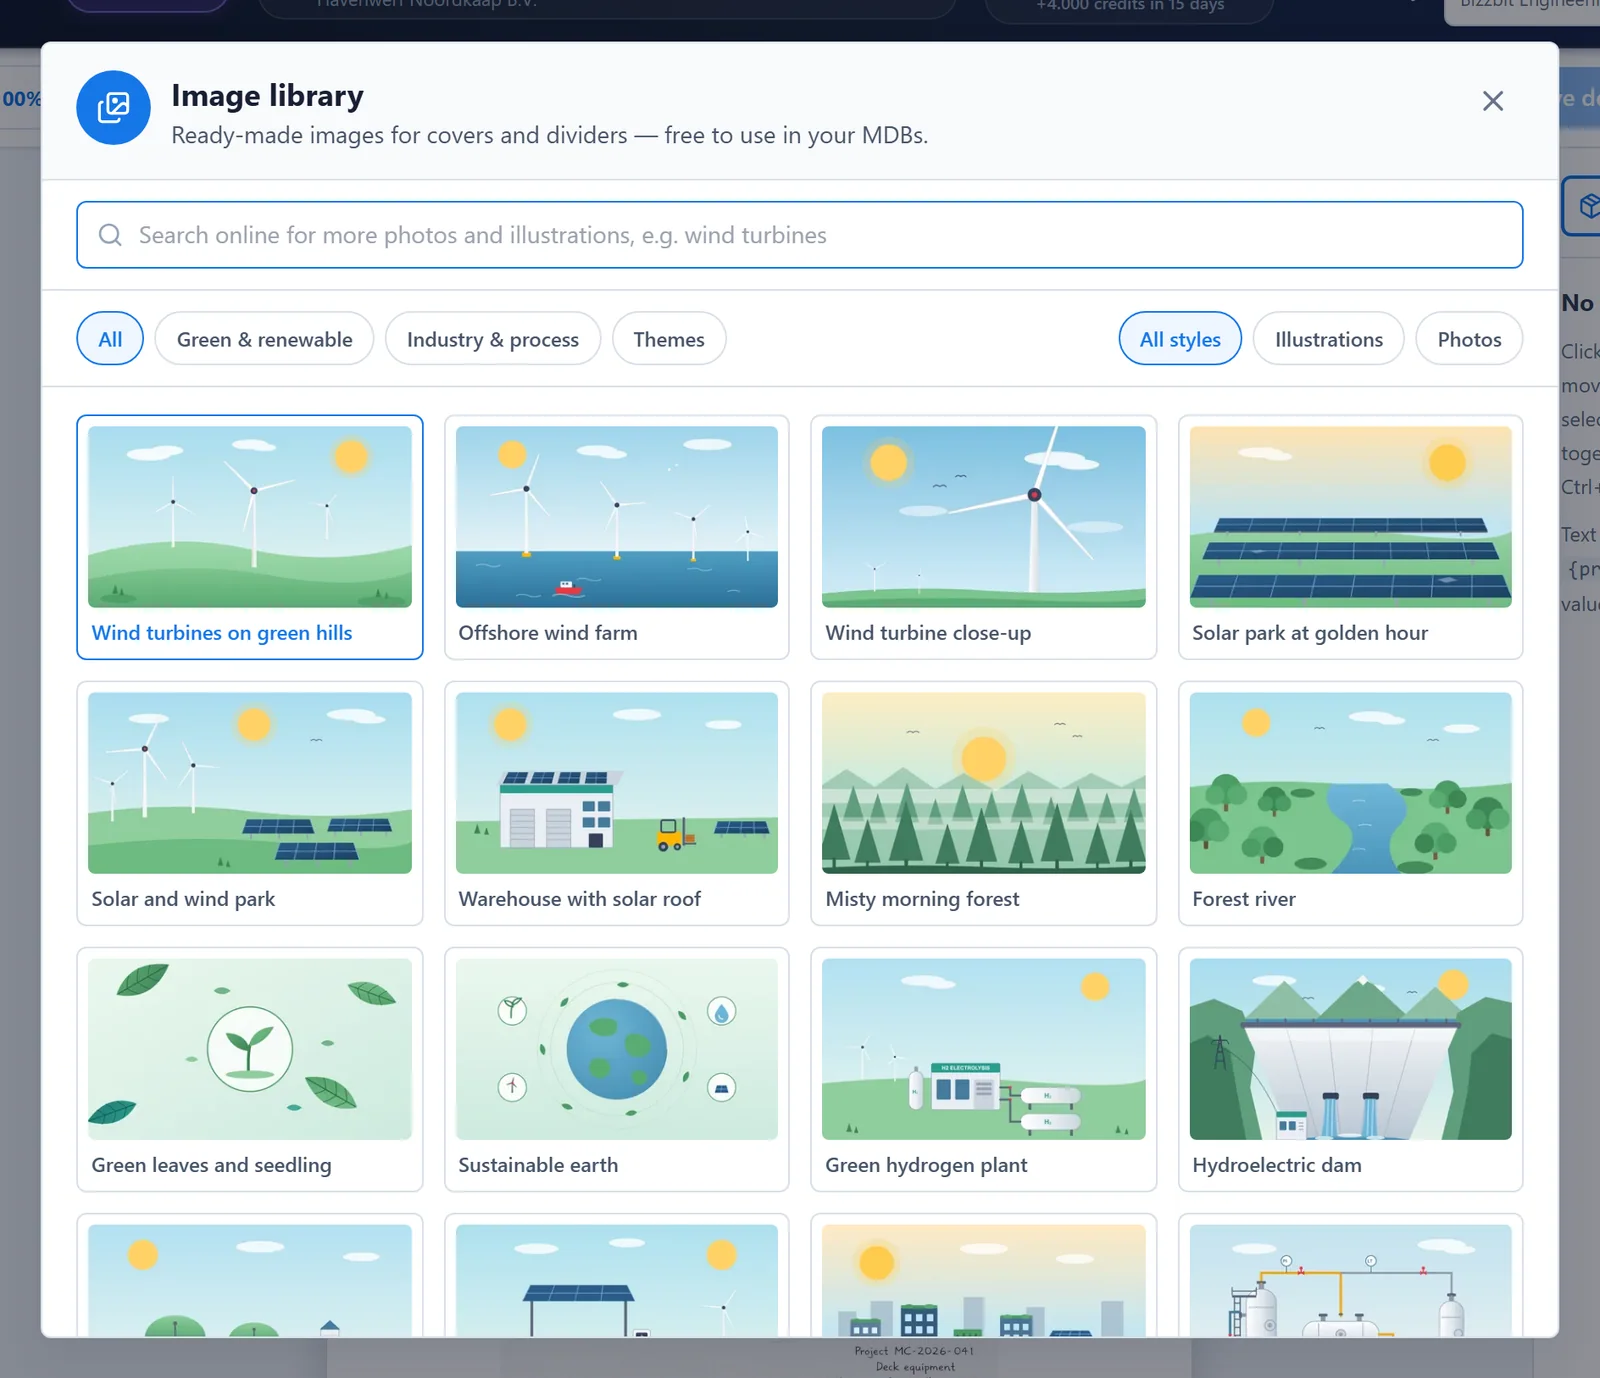
To swap a picture later, select it and choose another one from the library in its properties. The picture keeps its position, size and opacity.
5. Give every product a sketch#
The Product sketch element shows each product's own sketch on its cover. Until a product has a sketch, a placeholder drawing is shown.
You add the sketch in the product form (Edit product, or step 2 of New product) with Choose image, Paste screenshot or AI generate. AI generate turns a photo, a 3D view or a PDF with the general arrangement drawing into a clean sketch in four steps: Upload, Style, Generate and Result.
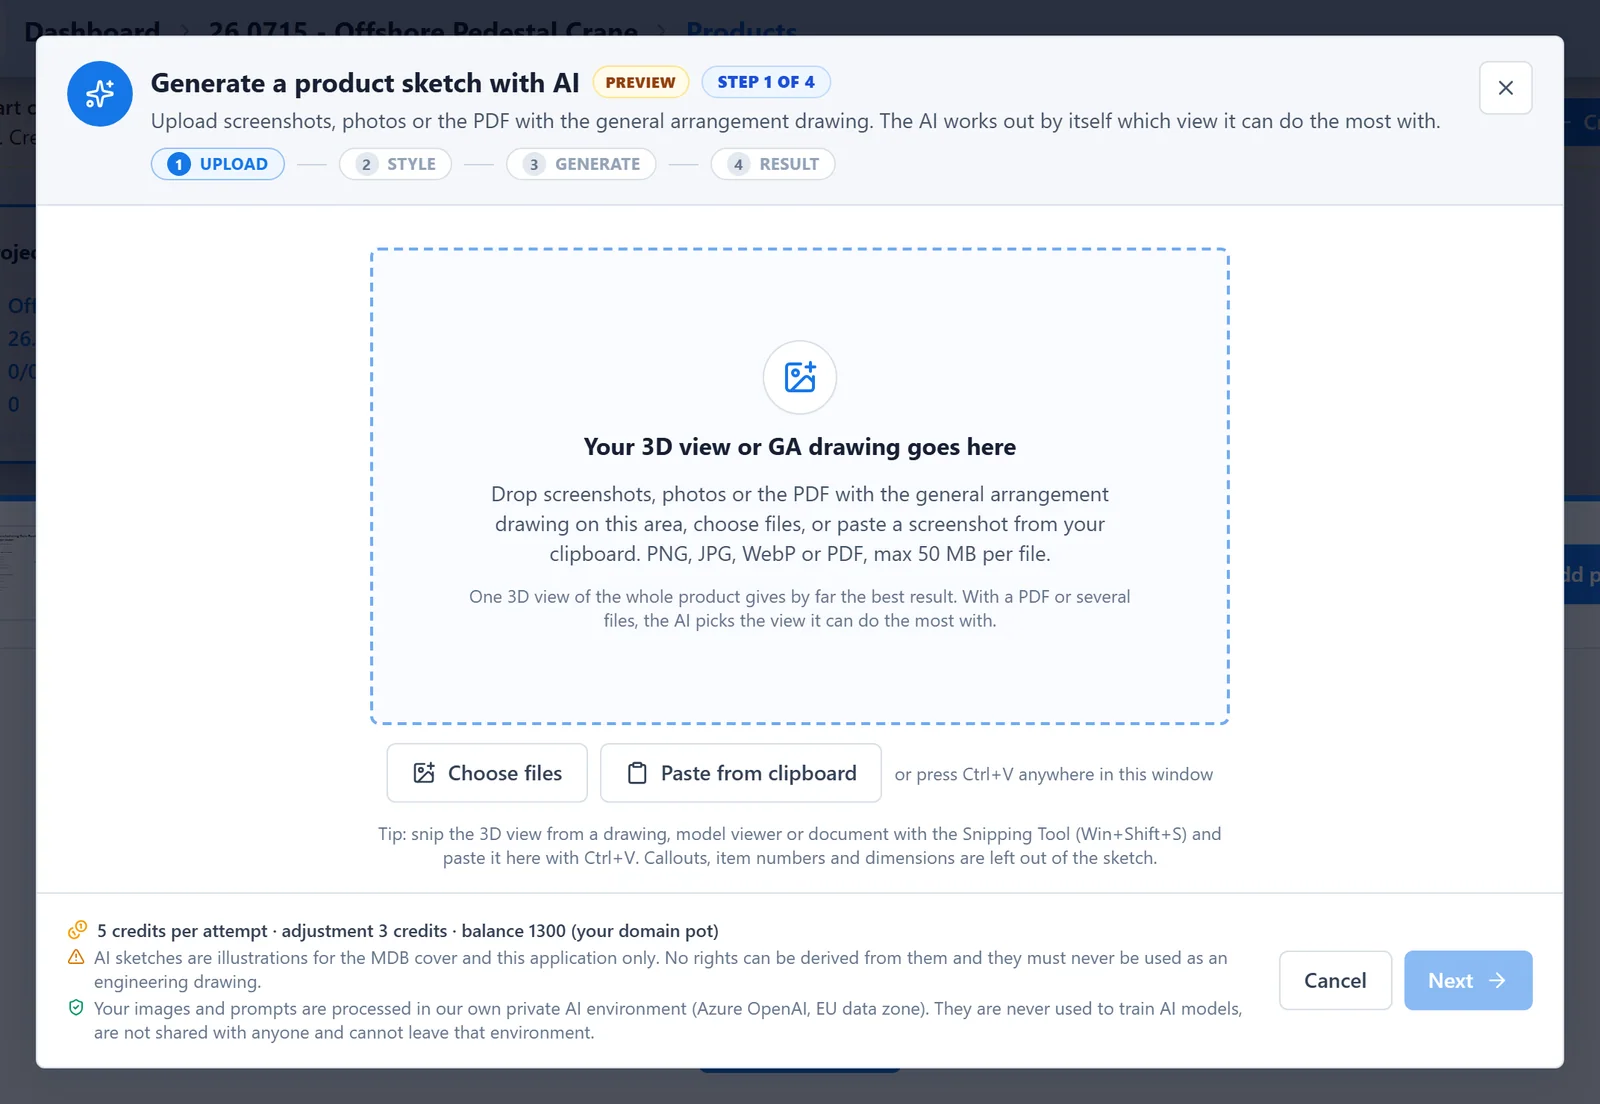
- Pick a style: Pencil sketch, 3D visual or Technical blueprint.
- On the result, click Use this sketch, give a short instruction with Adjust sketch, or click Try again for a new drawing.
- The cost per attempt is shown at the bottom of the wizard. Only a successful attempt is charged.
AI sketches are illustrations for the cover. No rights can be derived from them and they must never be used as an engineering drawing. Your images are processed in a private AI environment in the EU and are never used to train AI models.
6. Check the whole book#
Click Preview (the eye icon) in the top bar to see the cover, table of contents, divider sheet and spine side by side, including changes you have not saved yet. With Preview with you choose which product's data fills the sheets. Download PDF renders the current sheet exactly as the export will.