The chapter structure is the index of the MDB. You build it in the structure editor: add main chapters and subchapters, choose what kind of documents each chapter holds, and put them in the right order. Every change is a draft until you click Save changes.
1. Open the structure editor#
A new MDB opens in the structure editor by itself. To change a saved structure, click Edit structure in the panel on the right of the MDB.
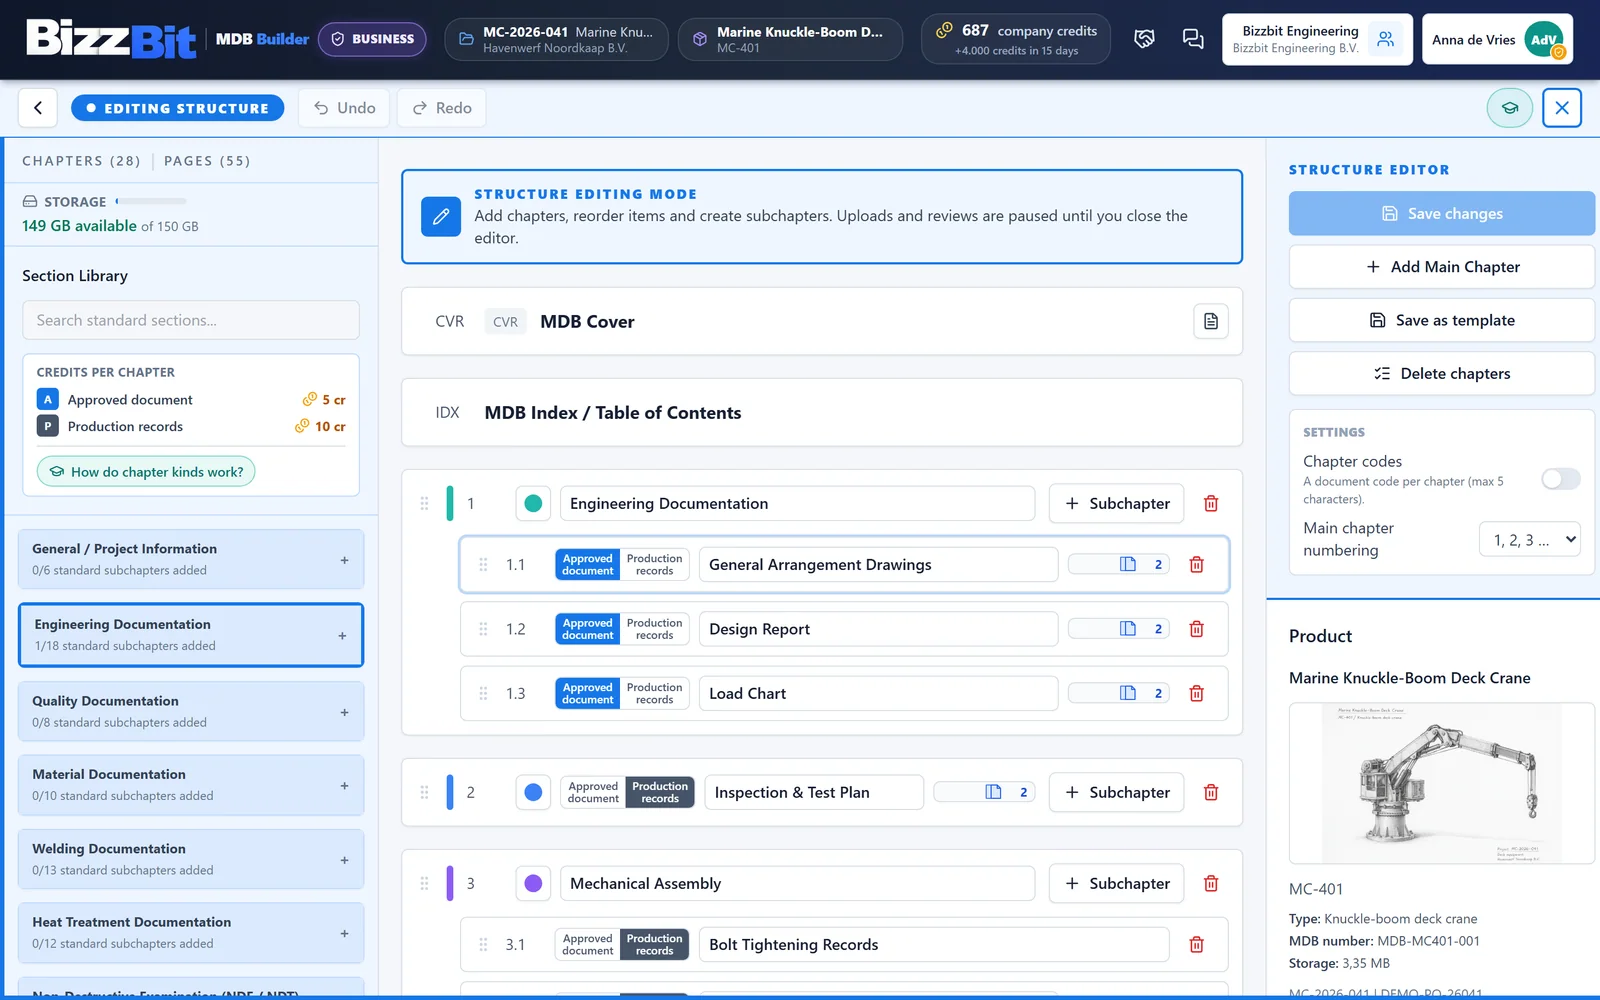
You can see that you are editing: the top bar turns blue and shows Editing structure, and a banner says Structure editing mode. While you edit, uploads and reviews in this MDB are paused. Use Undo and Redo in the top bar, or Ctrl+Z and Ctrl+Y, to step through your changes.
Edit structure is greyed out when you don't have permission to change the structure. See Roles and permissions.
2. Add main chapters and subchapters#
- Main chapter: click Add Main Chapter on the right, enter a Chapter title and click Create chapter.
- Subchapter: click Subchapter on a main chapter, enter a Chapter title and click Create chapter.
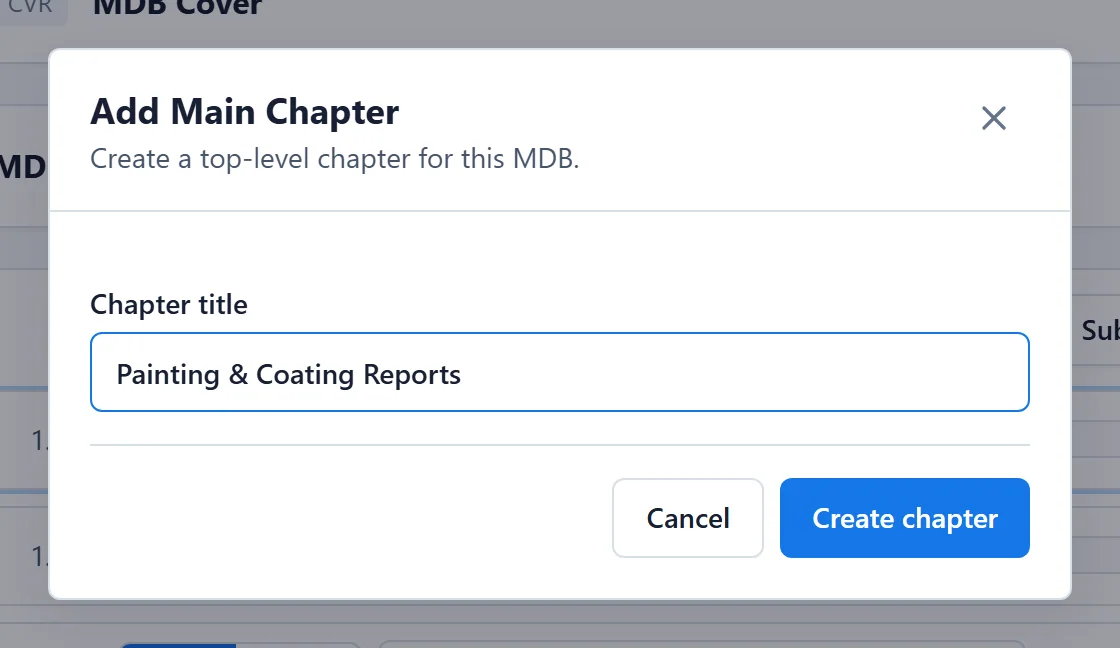
The structure has two levels: main chapters and their subchapters. A main chapter with subchapters is a heading. The documents go into its subchapters.
3. Add standard chapters from the Section Library#
The Section Library on the left lists standard subchapters, grouped by main chapter.
- Click a group to unfold it, or search with Search standard sections....
- Click a section to add it. It lands as a subchapter under a main chapter with the group's name, which is created when it isn't there yet.
- Click an added section (green tick) again to remove it. A section that already holds documents can't be removed this way.
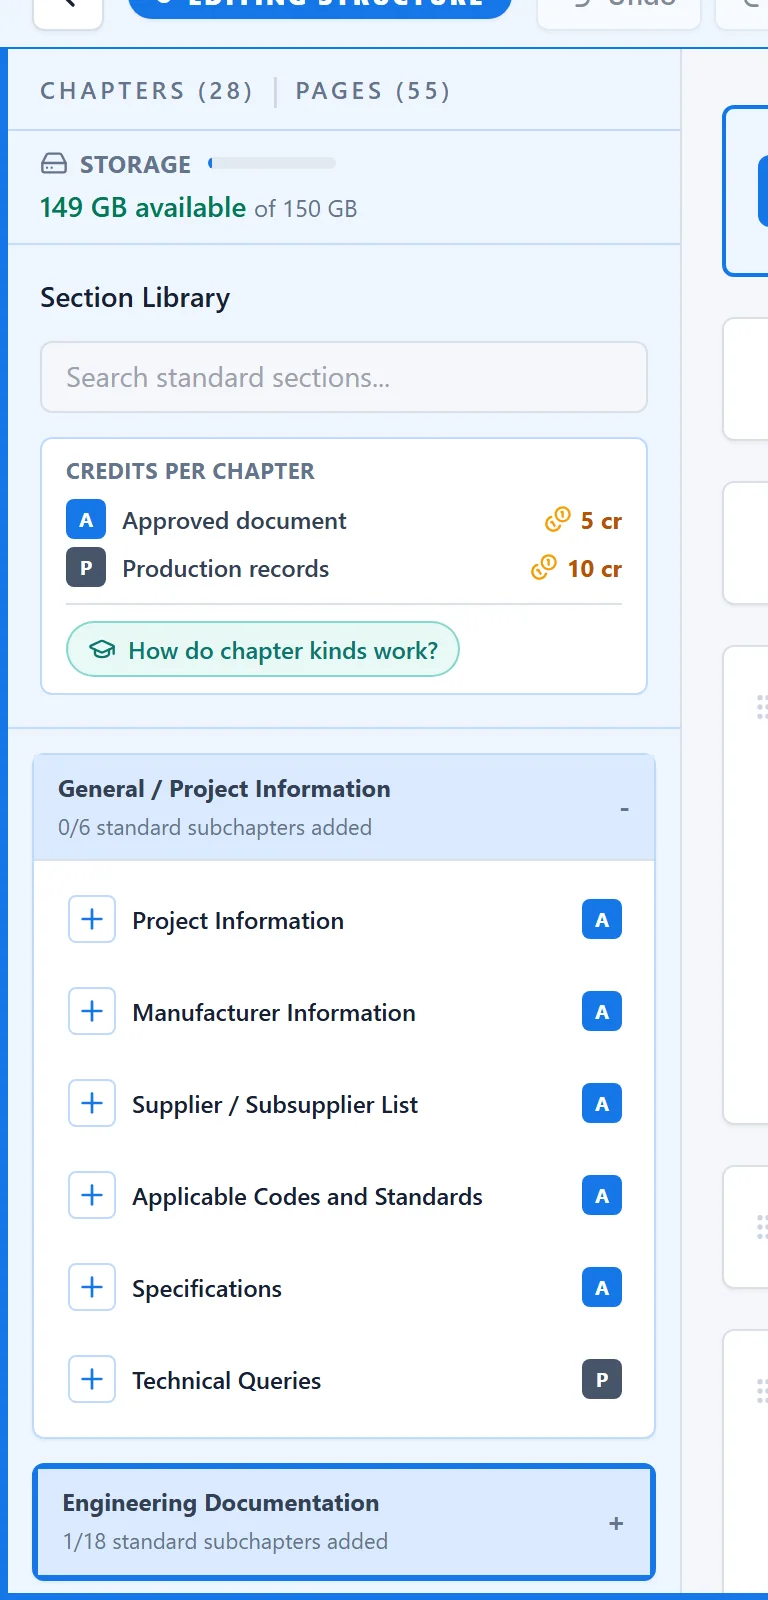
The counter under each group shows how many of its standard subchapters are in your structure. A group with added sections gets a thick blue frame.
4. Choose the chapter kind#
Every chapter without subchapters holds one of two kinds of content:
| Kind | Holds | Checks |
|---|---|---|
| Approved document (A) | One approved PDF with its own document revision | No internal checks |
| Production records (P) | Any number of files, arranged page by page | Internal checks before release |
- In the Section Library, click the A or P badge next to a section to choose its kind before you add it.
- In the structure, click Approved document or Production records on the chapter row.
Production records is the default. Main chapters with subchapters and embedded products always hold production records. The top of the Section Library shows the credits per chapter kind. Hover How do chapter kinds work? for a short explanation.
Switching the kind of a saved chapter that already has content resets the chapter: all pages placed in it are removed. You confirm before anything happens, and the price difference is settled when you save. On a product with units, an approved document is one document for all units, so choosing it makes the chapter a common chapter. See Products with multiple units.
5. Rename, arrange and delete#
- Rename: click in the title of a chapter and type.
- Colour: click the coloured dot (Change chapter color) and pick a colour. The colour marks the chapter in the chapter list and on its divider sheet.
- Reorder: drag a chapter by its handle on the left. Drag a subchapter onto another main chapter to move it there. A main chapter that holds its own documents can't receive subchapters.
- Delete one chapter: click the bin icon (Remove chapter) and confirm with Delete chapter.
- Delete several: click Delete chapters on the right, tick the chapters, click Delete and confirm. A selected main chapter takes its subchapters with it.
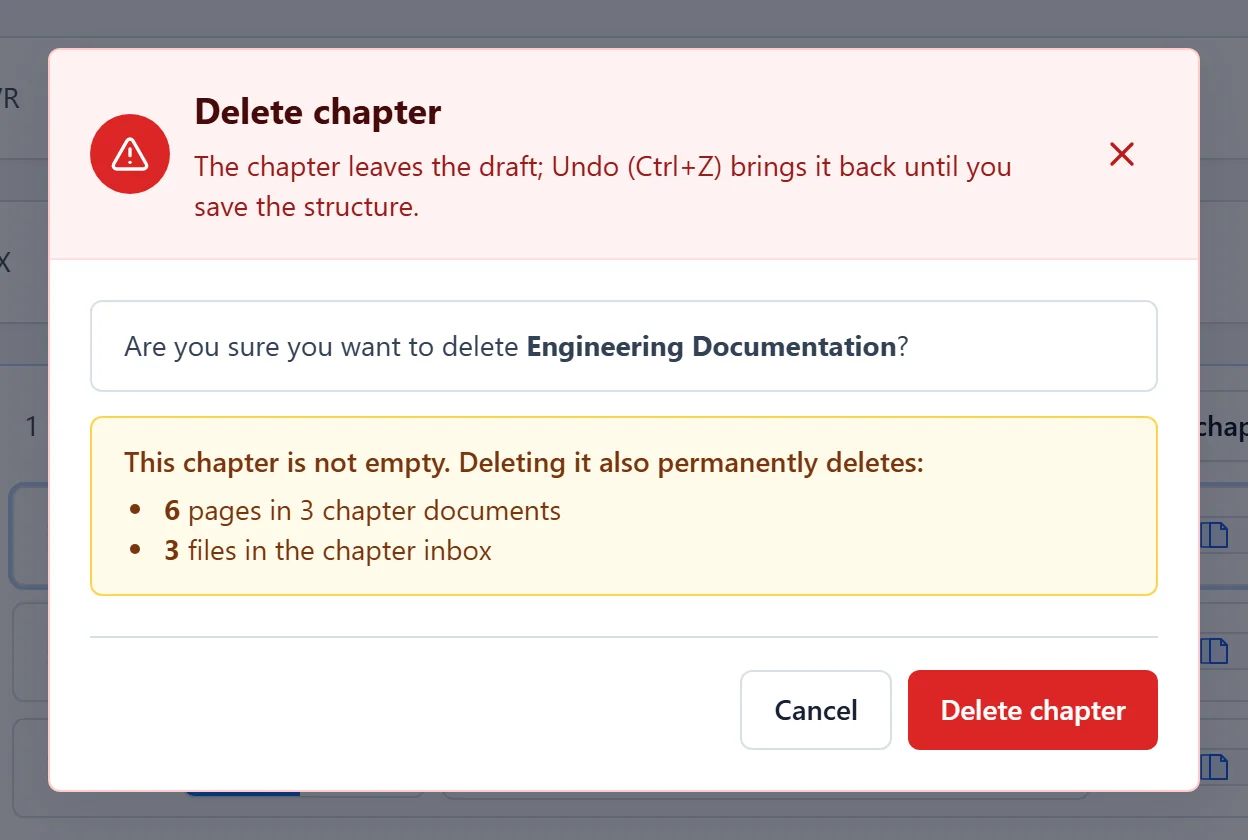
A deleted chapter leaves the draft. Undo brings it back until you save. When you save, a chapter that held documents is deleted permanently, together with its pages and the files in its chapter folder.
6. Chapter codes and numbering#
The Settings block on the right applies to the whole MDB:
- Chapter codes: switch it on to give every chapter a short document code of up to five characters. A Code field appears on each chapter row. The chapter list shows the code next to the chapter number, and the table of contents can show the codes in a column of their own. See Style the cover and index.
- Main chapter numbering: choose 1, 2, 3 … or A, B, C …. Subchapters follow their main chapter: 3.1, 3.2 or C.1, C.2.
Both settings are saved together with the structure. See Book numbers and document numbers for how they appear in the export.
7. Save the structure#
When the structure is right, click Save changes. As long as new chapters are waiting, the credits they cost are shown under the button (… credits on save).
The Confirm credits window shows what you pay:
- Added chapters, per chapter kind. A main chapter with subchapters is free: you pay for the chapters that hold documents. Embedded products are free as well.
- Switched to another kind: the price difference.
- Removed chapters: refunded, but only when they were never used. A chapter that ever held a document or a chapter folder file shows already used, no refund.
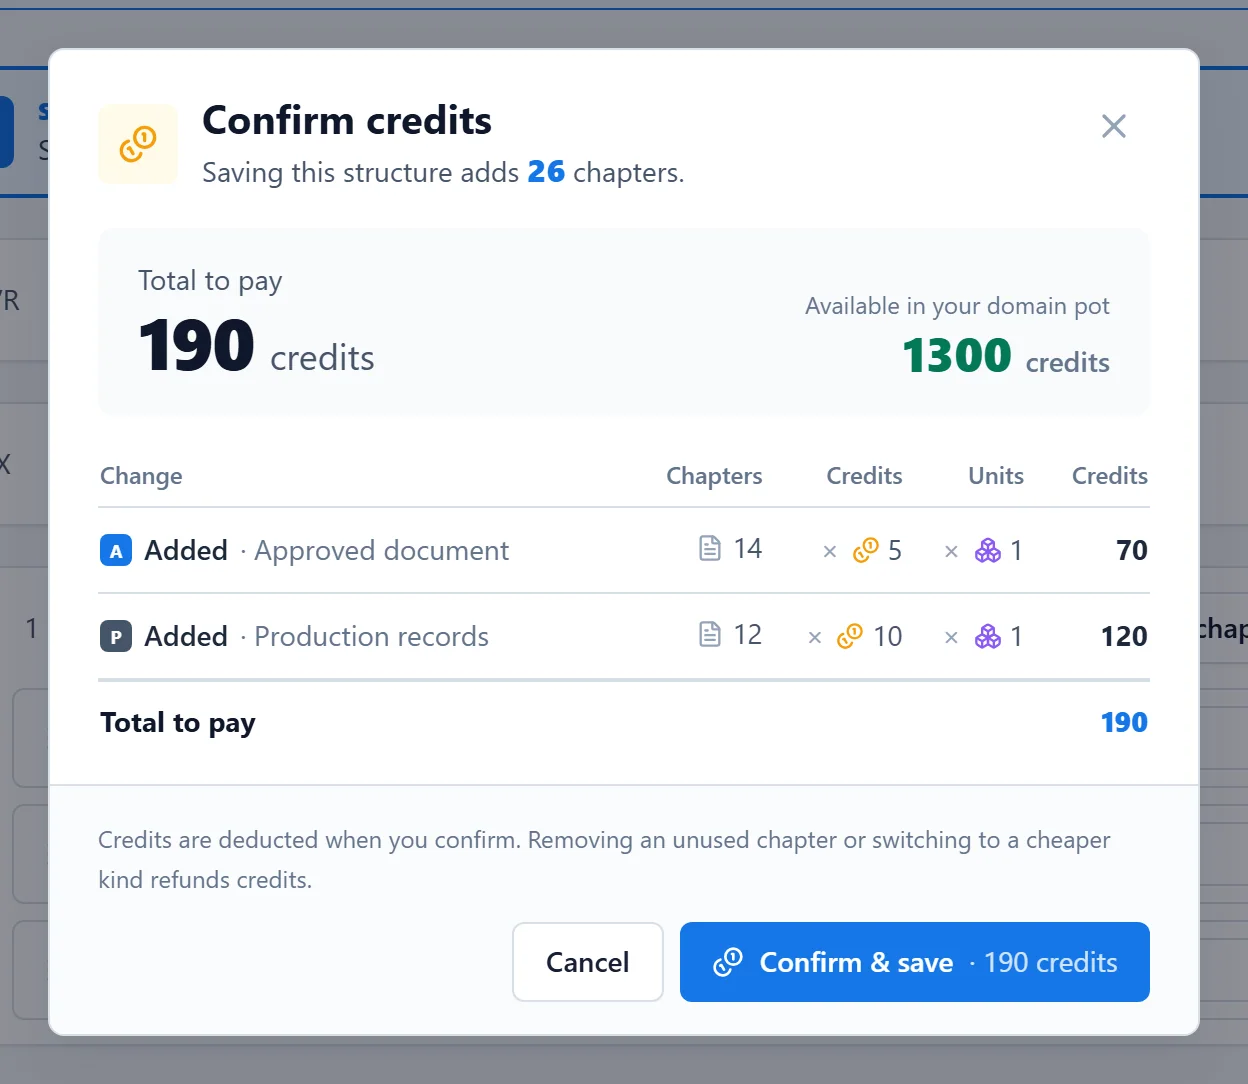
Click Confirm & save. When your credits run short, the window says by how much. If you may buy credits, you can top up straight from the window; otherwise ask an admin. Your draft stays in the editor either way. See Credits and plans.
After the first save, the structure is locked: the editor closes and the MDB is ready for documents. The line above the chapter list reads Structure is locked. Upload documents, approve chapters and share with suppliers. Uploads only become available after this first save.
Leaving without saving#
Close the editor with the X in the top bar. With unsaved changes, MDB Builder asks what to do: Save changes, Discard changes or Cancel to keep editing. The same question appears when you leave the MDB while editing.
What's next#
- Add documents to chapters
- Templates and presets: save this structure as a template.
- Embedded products: link the MDB of a sub-assembly as a chapter.